Portfolios in Mahara can be created from a page or a collection.
A page contains a selection of your content, known as 'artefacts' that you can add or choose from your reusable content which you can arrange and present to others.
A collection is a series of pages to navigate through your content in a logical order, without putting everything on a single page.
Pages and Collections are the basis for your portfolios in Mahara.
Whether you're creating and organising content, editing and updating information, collaborating with others, or sharing your work more widely, these guides cover the essential tasks and features you need when creating and using pages and collections in Mahara.
Getting started with pages and collections
Use a page to display related artefacts together, such as project work, achievements, or evidence for assessment.
On the dashboard, click + Create
Select + Create and choose Page
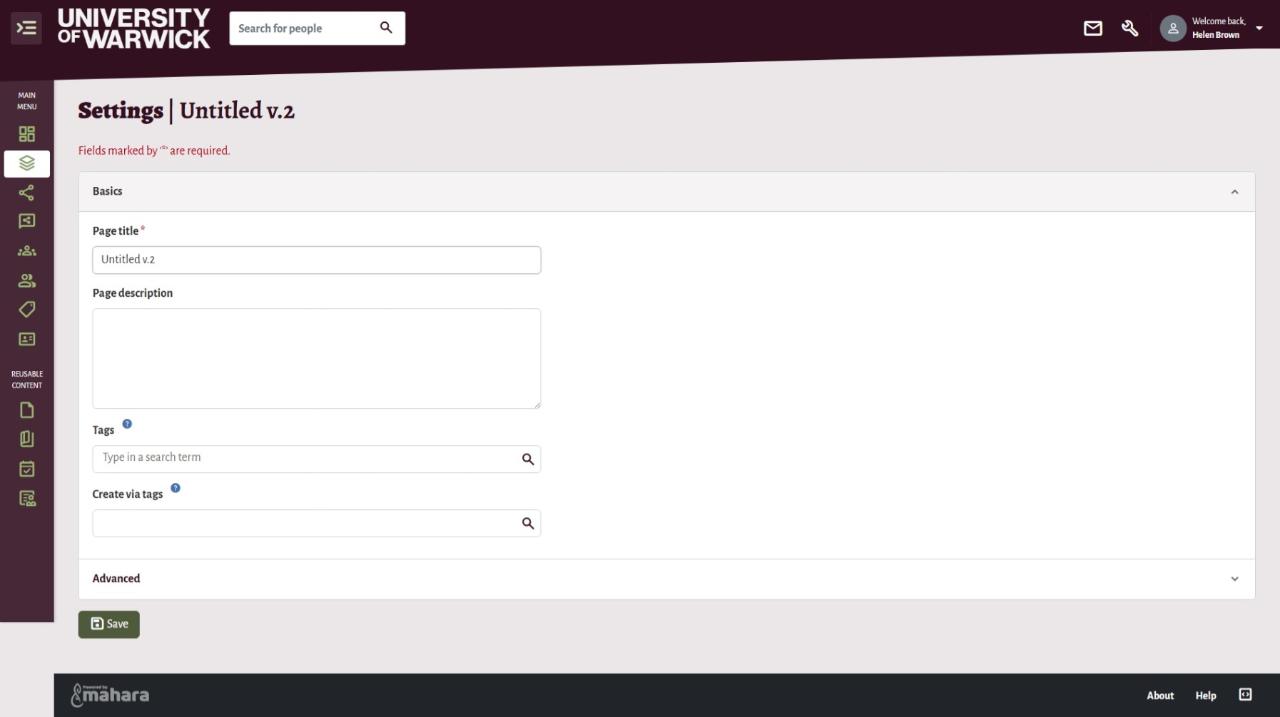
Complete the page settings:
Page title (required)
Page description - a brief overview of the purpose of the page
Tags - keywords to help you find the page later
Create via tags (optional) - use this to automatically add artefacts and sections that match selected tags.
If creating a basic page, select Save
If using the Advanced settings
Add Instructions -for setting up the page in the editor to scaffold the portfolio creation
Choose whether to prevent the removal of sections
Select a name display format - this is the name others see when they view your portfolio
Upload a cover image (not currently visible in Mahara 26.04)
Choose whether to enable Sign-off (this options works best in a collection with a portfolio completion page)
Select Save.
If you want to organise your portfolio, you can create a collection that holds multiple pages.
On the dashboard, click + Create
Select + Create and choose Collection
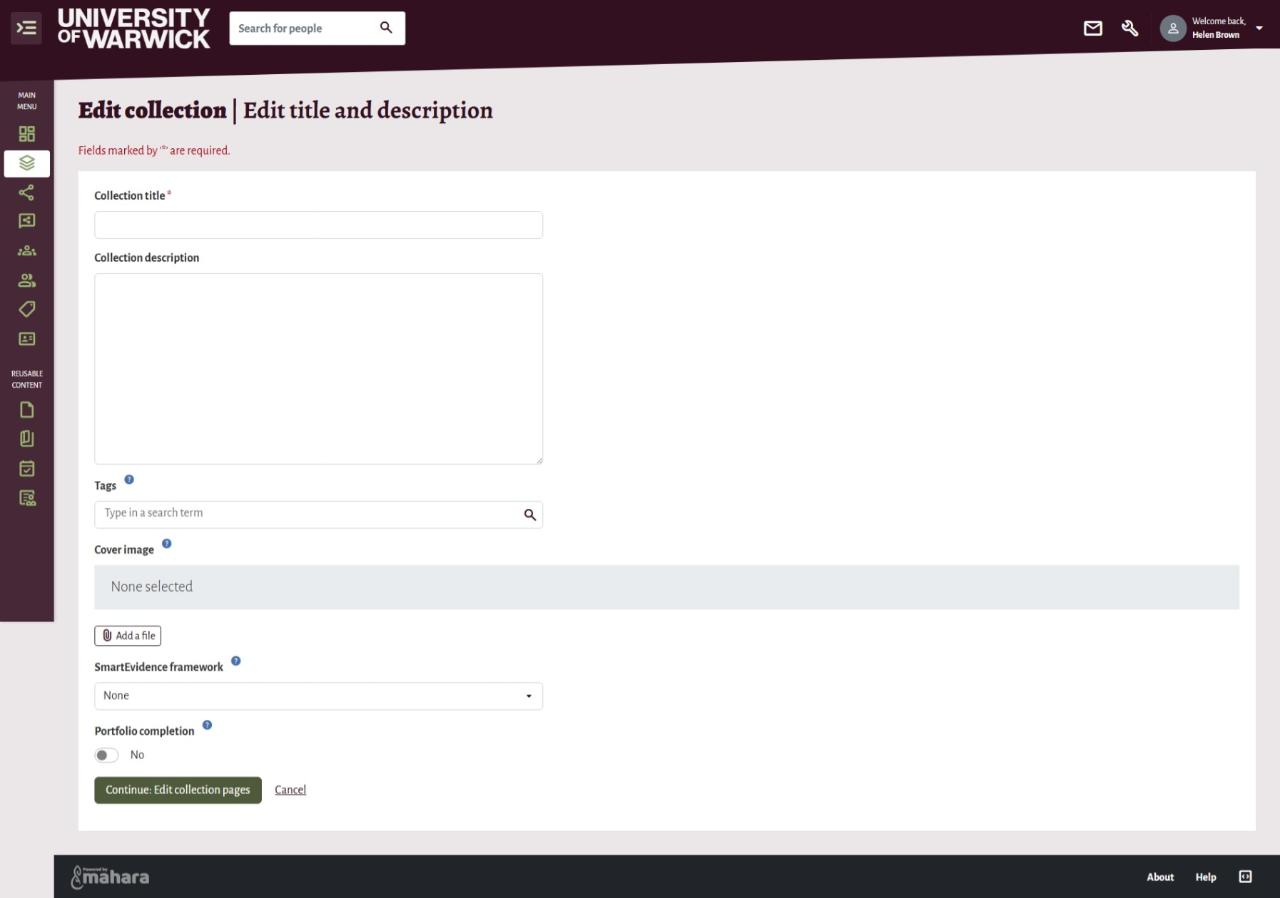
Complete the page settings:
Add a Collection description - a brief overview of the purpose of the collection
Tags - keywords to help you find the page later
Upload a cover image (not currently visible in Mahara 26.04)
Select a SmartEvidence framework if required - if your collection will be linked to a competency or assessment framework. Note that once annotations have been added to the pages in the collection, you can no longer change the associated framework
Choose whether to enable Porfolio completion - when enabled, a 'Portfolio completion' page is added to the start of this collection
Select Continue edit collection pages to save the new collection.
Add pages to the collection by selecting the pages and clicking +Add pages
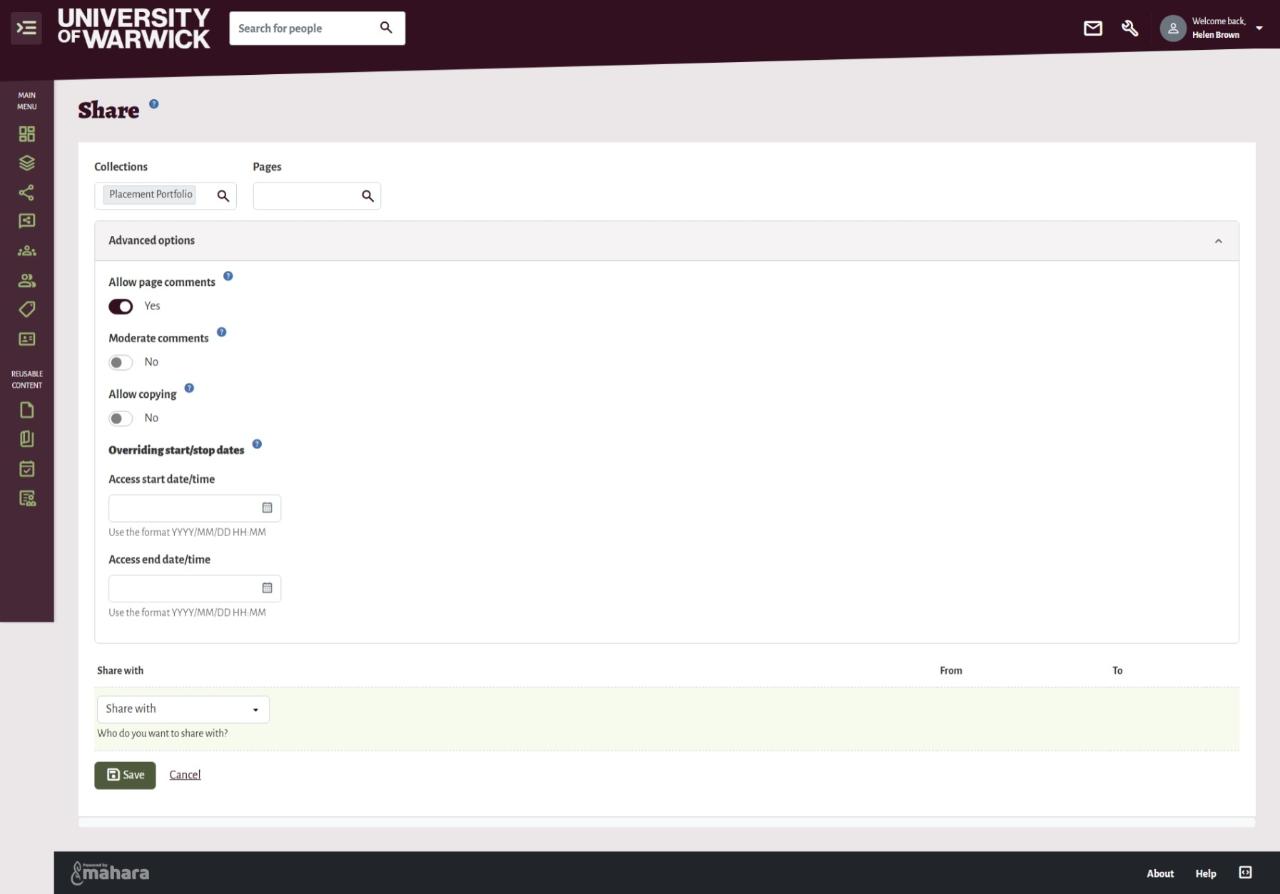
Select the Continue: Share button where you can set your Advanced options (if required to enable comments, copying, moderation and overriding start and stop dates for access to the collection)
Select from the Share with dropdown to select who to share your collection with. Enter their details and press Save.
Tip: You can add a page when you are in ‘Edit’ mode on a collection page to quickly include it without needing to create it outside of the collection first.
Once you have uploaded files, images and other artefacts, or created other reusable content such as journals or plans in Mahara, you can organise and present them in your pages and collections.
Either create a new page first or select one of your existing pages
Once your page is open, you can add and remove content via the navigation bar on the right hand side of the page. The bar stays fixed in place on the right-hand side of the screen. That way, the buttons can be accessed on short and long pages without scrolling
From the navigation bar, select the pencil to open the edit 'fly' - on mobile devices the fly will open at the bottom of the screen.
To add a new content section quickly, drag and drop the icon, or drag and drop the quick access buttons for the commonly used content types: text, images, files or folders.
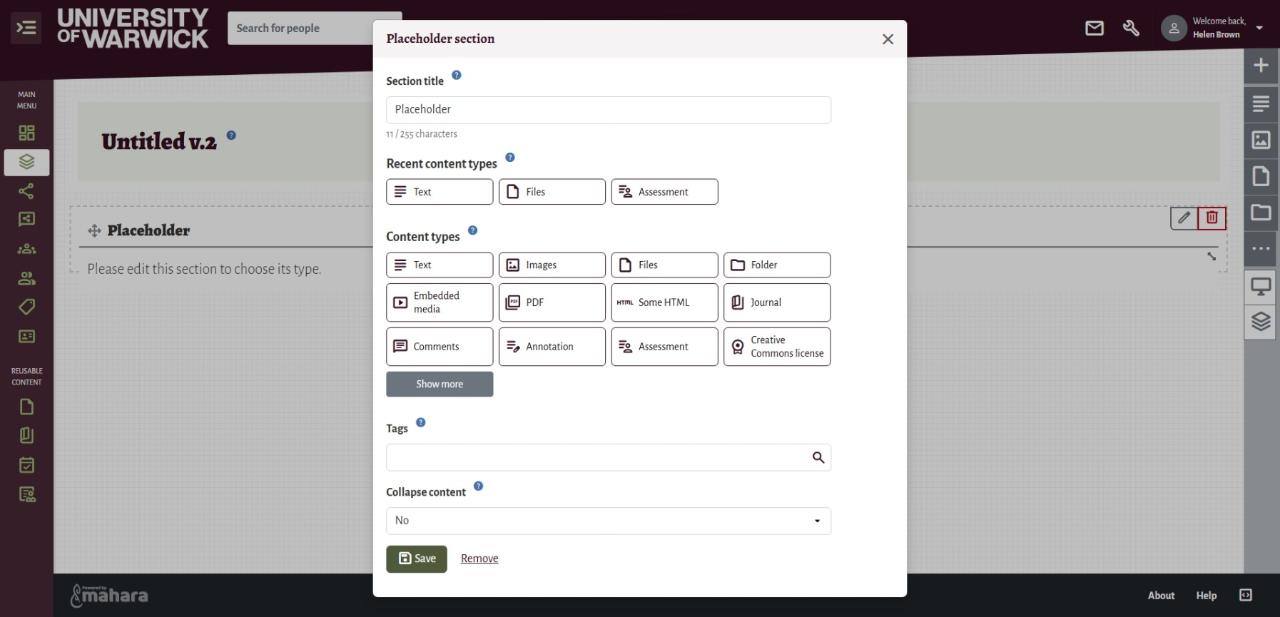
To add other content types, such as embedded media, PDF files, a Journal or a Plan etc., dragging and dropping the icon opens up the Placeholder section, where you can choose your content, tags and whether to display the content collapsed or in full.
Add your desired content, select the tick to add your page and Save.
Managing pages, collections and tags
When working across Mahara content and sections it is useful to note that:
the red bin deletes the item or section
the grey pencil enables you to edit the item or section
the cogs open up the configure tab, allowing you to edit the basic and advanced settings of a page
the grey arrows allow you to drag and drop items or sections to re-order them on the page or collection
the grey dots allow you to re-order content, i.e the order of pages in a collection
these grey arrows are used to resize blocks by clicking, holding and dragging the icon.
You can copy your own pages and collections, as well as content shared by others when they have enabled copying permissions.
Copy a page or collection directly
Open the page or collection you want to copy
On the right hand side of the page selectto open more options and chooseCopy
If the page belongs to a collection, choose whether to:
Copy the entire collection (all pages), or
Copy the current page
The copied page or collection is added to your portfolio to edit or customise as required.
Copy a page or collection from Portfolios
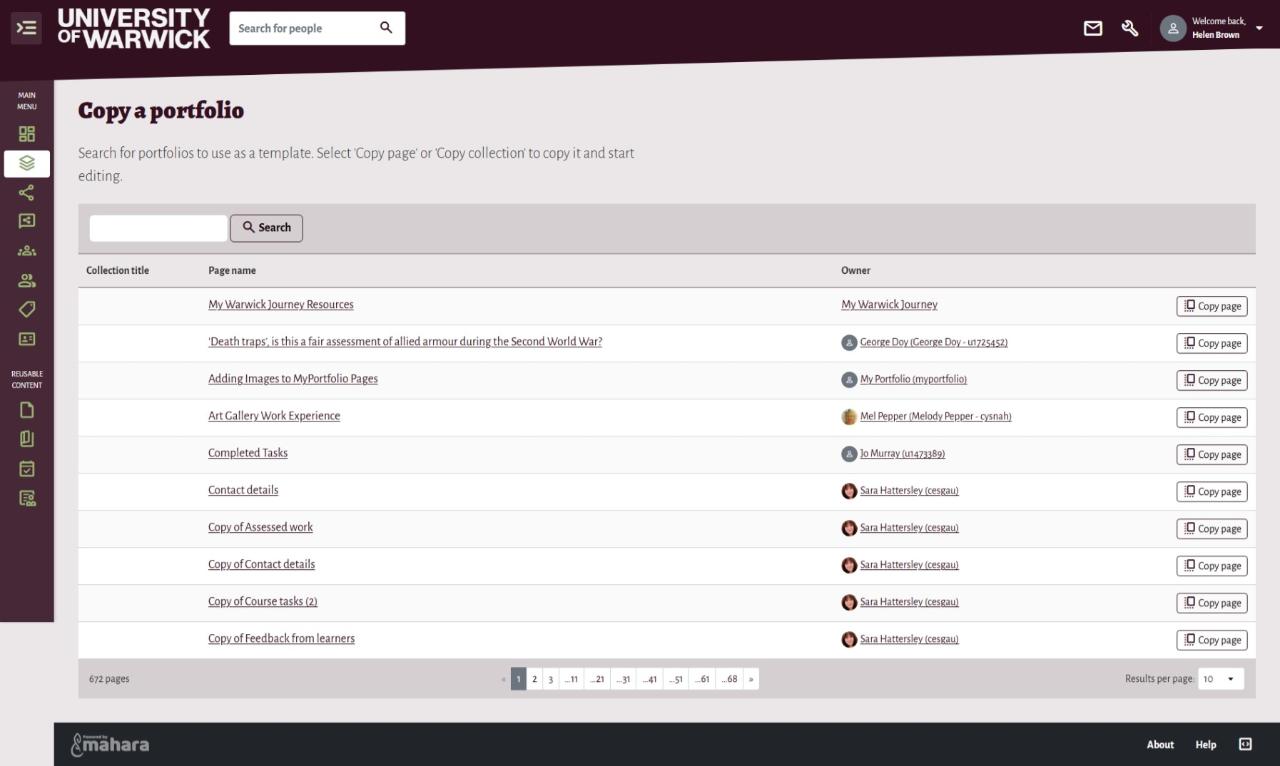
Select Portfolios from your main menu
Select the green Copy button
Browse or search for content that is available to copy
Search for the content you require
Select a collection title to preview the collection
Select a page title to preview an individual page
Select an owner's name to view their profile
If the page belongs to a collection, choose whether to:
Copy the entire collection (all pages), or
Copy the current page
The copied page or collection is added to your portfolio to edit or customise as required.
Important to note
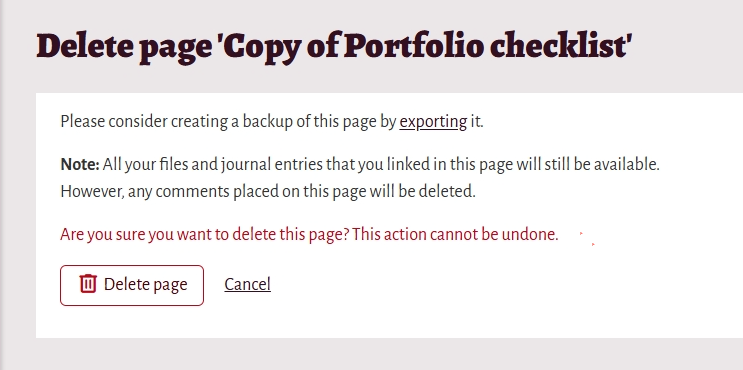
Deleting a page is permanent. There is no revision history and deleted content cannot be recovered
When a page is deleted, all text sections and external content sections are permanently removed
Other artefacts (such as files) are not deleted, as they are stored elsewhere in Mahara
Deleting a collection also deletes all pages within that collection
Portfolio
You can delete a portfolio at any time, provided it has not been submitted for feedback. Before deleting a page and collection, you can choose to export the portfolio first. This allows you to create an archive copy to retain, before permanently deleting.
Tags are keywords that you can give to artefacts, pages and collections in your portfolio to find them more easily later on. It is recommended to use tags wherever possible.
Adding Tags
When creating your page, or adding a new content section you can add a tag. To create a new tag, type in your tag name and press enter to add it your list
Save the page to apply your tags
If you have previously added the tag, start to type the tag name in your drop-down list and select the tag to add it. The number beside the tag shows how many times you have used it across your portfolio
To remove a tag, select the small to the left of the tag name or selecting delete on the keyboard.
Tag Cloud
Your Tag Cloud is available on your dashboard where you can quickly see a cloud of your tags. The more the tag is used across your portfolio, the larger its font size
Select All Tags at the bottom of the cloud to view all your tags
This opens up your list of tags, select your tag to see all associated content across your portfolio.
My Tags
Open up your My Tags section by either selecting All Tags on your Tag Cloud or by selecting Tags on your main menu on the dashboard
Here, all your tags are displayed with their associated artefacts, pages, sections and collections
You can select to view your tags alphabetically (default), or by frequency (most used first)
You can filter your tagged content to show it by content type, by Collections or name and creation date
You can edit your tag name by selecting the grey pencil, or delete the tag by selecting the red bin.
In the page settings section, complete Create via tags to automatically add artefacts and sections that match selected tags.
Once you have added your selected tags and saved your changes, the page will be created with all the existing artefacts and sections under the category of those tags. If you select more than one tag, you only see content that matches all selected tags, i.e. it must match tag one and tag two.
The page is populated only with content that is already tagged at the time of creation. If you tag new artefacts later, they will not be added automatically. To include them, you must either add them manually or use the Create via tags function again. Only artefacts that are not already on the page will be added. This also means that if you previously removed a tagged artefact from the page, it will be added again when the function is rerun.
Content contained within tagged pages is not added automatically. The individual artefacts themselves must be tagged in order to be included.
After artefacts have been added automatically, you can rearrange or remove them as required. Because there are several ways to add artefacts and sections to a page, refer to the guidance on content mappings when multiple artefacts of the same type are added.
Sharing pages and collections
Remember to share with care. Check what information you're sharing and who you're sharing it with. Use expiry dates where possible, and avoid sharing unnecessary personal data.
Use the Share option to give one or more people access to your portfolio pages or collections. You can apply the same permissions to multiple pages and/or collections at once.
By default, your portolios are only visible to you. Share them with the public, registered account holders, institutions, groups or individuals.
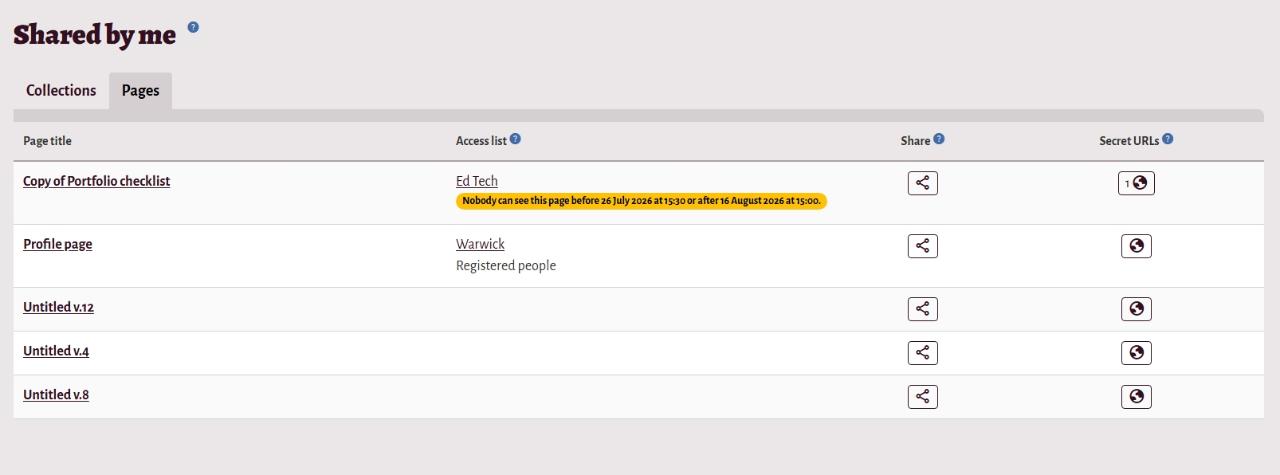
On your dashboard, select the Share button: Control your privacy or select Shared by me from the Main menu
Find the Collection or Page you want to share and select to set who can view your portfolio, for how long, and with what permissions
You can set sharing permissions in bulk by selecting multiple pages and collections and applying the same permissions at once to all of them. Click into the Collections or Pages search boxes and select your items to share
If using Advanced options, choose whether to enable page comments, moderate comments, allow copying of your selected portfolios by other users, or add overriding start or stop dates so sharing only occurs between your selected start and end dates
Choose from the dropdown menu who to Share with, i.e. a friend, a group, the public. Enter their details in the Search menu and if applicable, select their special role from the dropdown menu (usually left as no special role but includes Manager, Peer, Peer and Manager or Reviewer)
If applicable, enter your sharing from and to dates
Select the green Save button for access rules to applied to your chosen collections and pages or Cancel to abort the changes
If you select individual people or a group with whom to share your portfolio, they will receive a notification. That notification contains a link to your portfolio. If you restricted access for your portfolio to a particular time, the time frame is mentioned in the notification.
For more information visit the Mahara manual guidance on using Secret URLs.
An ePortfolio is most valuable when you share it with others, such as tutors, employers, or project collaborators. You can share your portfolio in two ways:
Share with Warwick users – such as coursemates, module leaders, and groups within Mahara.
Create a Secret URL – a private link that can be shared. Anyone with the link can view the page or collection.
Besides giving people who have a login or the entire public access to your portfolio, you can also give people who do not have an account on Mahara access to your portfolio pages and collections without making your work publicly available and searchable by search engines. Some example use cases:
when you create a portfolio for a job application and the prospective employer does not have a login
when you want to share your portfolio with a friend and also get feedback from them.
with an external assessor to evaluate your work.
To add a secret URL:
On your dashboard, select the Share button: Control your privacy or select Shared by me from the Main menu
Find the Collection or Page you want to share and select to edit the secret URL access
Select the green New secret URL button to generate a link
Select Copy to copy the link and share it with others
Select the grey pencil to add a start and/or end date for access
Select the green Save button
Choose the red bin if you want to delete the secret URL when it is no longer needed.