Edit an existing page's content, properties or permissions
If you're a new editor or admin for a SiteBuilder site, at some point you'll need to change a page's content or properties. This guide will walk you through the steps for each:
Note: If you're unsure about editing a live page, you can request a test site to practice on via theSiteBuilder ServiceNow form.
Edit a page's content
-
Browse to the page whose content you want to edit.
-
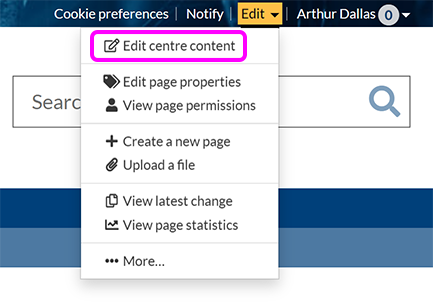
In the Utility menu (in the top right corner of every SiteBuilder page), select Edit > Edit centre content:
Note: If you're editing an old visual editor page, you may also see an option to Edit right content.
-
You see the content editor for the selected page. Here, you can add or edit content as you would when creating a new page.
-
In the Components Editor, selecting a component causes a toolbar to appear above it:

The toolbar allows you to edit options related to that specific component - for example, changing the Style of a content block, adding or removing tabs or accordions, or altering the colour of a button.
Tip: For full details of the options available for each component, see the Your content section of the SiteBuilder manual.
If the selected component is nested inside another component, the toolbar also displays the component heirarchy, which you can use to select which of the components in the stack you want to edit.
-
When you've finished editing the page, you can Preview or Publish it using the buttons in the top right of the editor.
Edit a page's properties
Page properties are initially set when you create a page, but can be edited at any time by users with edit or admin permissions.
The settings you specify in page properties determine:
- The page's URL
- What the page is called
- Whether the page is displayed in the local navigation menu or not
- Whether search engines can index the page or not
- The page contact
- Other settings specific to the active page template
The properties play an important part in how visitors find your page through search or menu navigation, and how they orient themselves when they arrive at your page.
-
Browse to the page whose properties you want to view or edit.
-
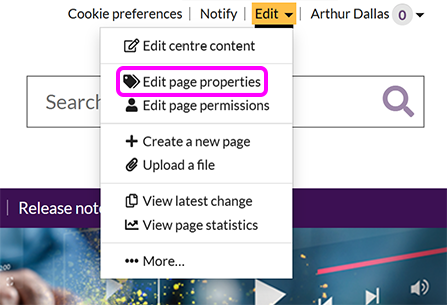
Go to Edit > Edit page properties:
-
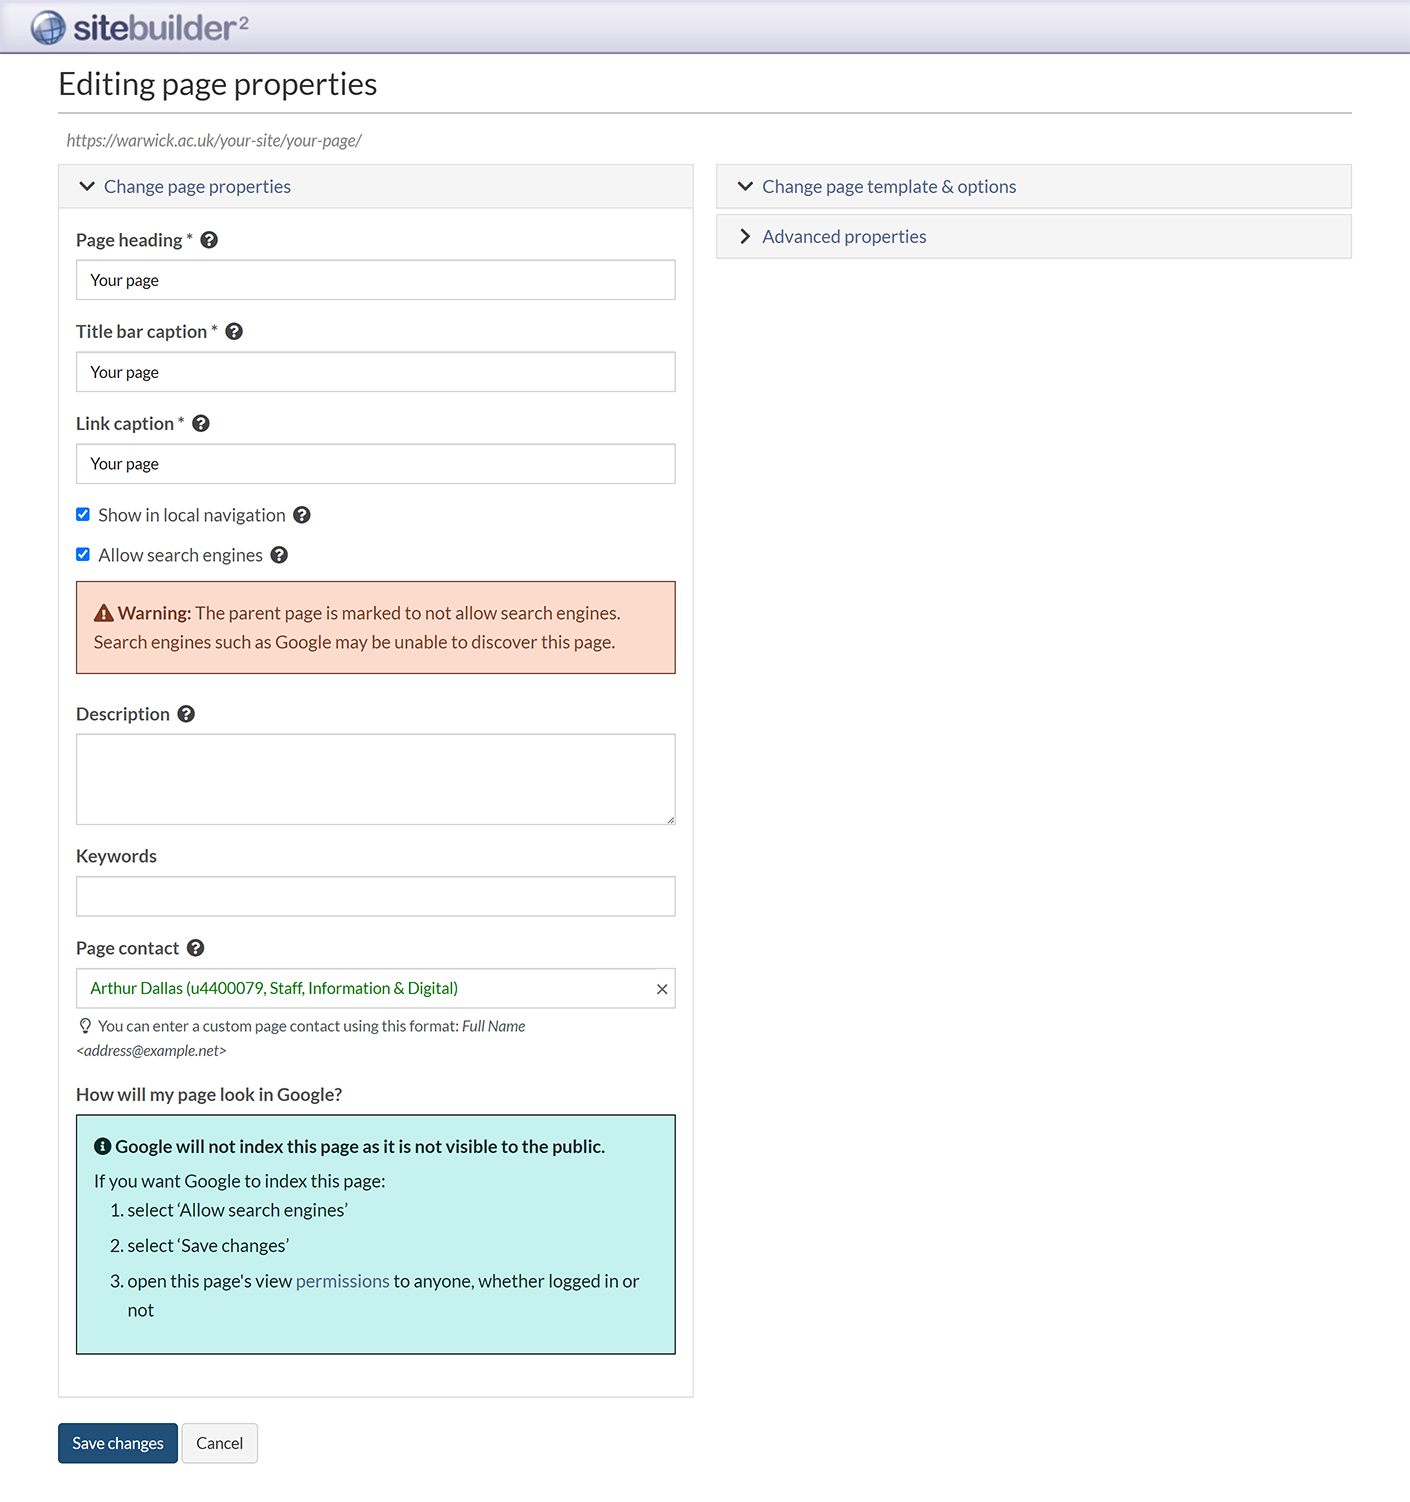
You see the Editing page properties screen:
-
Here, you can edit each of the page's properties:
Tip: For a full description of each of these properties and what it does, see our article on page properties.
-
When you've finished setting the page's properties, select Save changes.
Edit page permissions
Permissions enable page admins to restrict who can view, contribute to, edit, or administrate your pages. It's possible to assign permissions to individuals, predefined groups (for example, University staff, students or applicants) or existing web groups.
By default, a new page has the same permissions as its parent page.
-
Browse to the page where you want to edit permissions.
Tip: To edit permissions to an entire site or section, navigate to the home page or topmost page of the section.
-
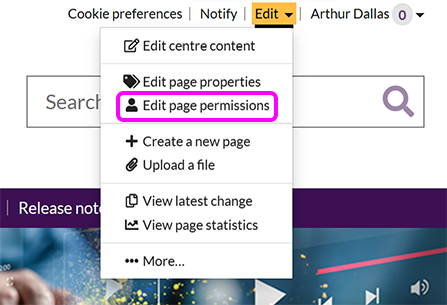
Go to Edit > Edit page permissions:
-
The Edit permissions screen shows the current permissions:
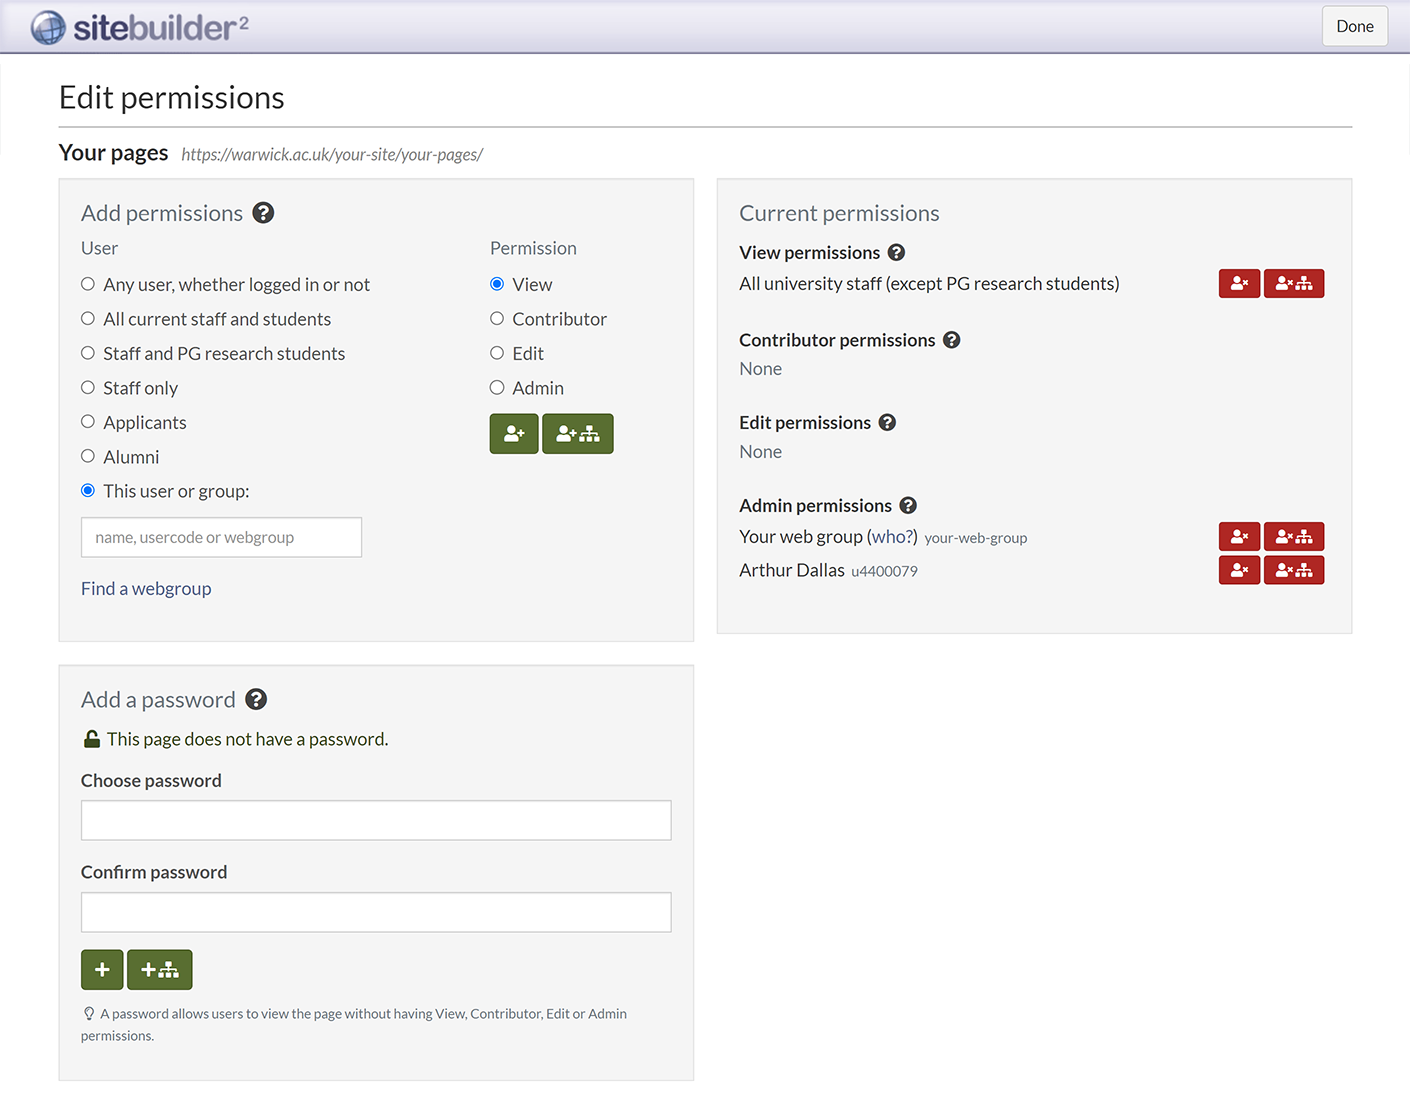
From here, we can add new permissions or remove existing permissions.
Add permissions
-
First, we need to specify who we want to add permissions for. Use the radio buttons under User to select one of SiteBuilder's predefined groups, or select This user or group and enter the name, usercode or web group you want to add in the box.
Important: When you make a page available to Any user, whether logged in or not it becomes publicly visible and must comply with the University's accessibility guidelines. The Components Editor Accessibility pane can assist with this.
-
Next, specify the permission type you want to assign. The permissions common to all page types are:
Note: Depending on the page template and comments settings, there may be additional permission types displayed here.
-
Apply the permissions by selecting the appropriate button:
-
Add permission to page: Give the specified user the selected permission on the current page only
-
Add permission to page & sub-pages: Give the specified user the selected permission on the current page and all pages and files below it
-
-
In the confirmation pop-up that appears, select Save changes:
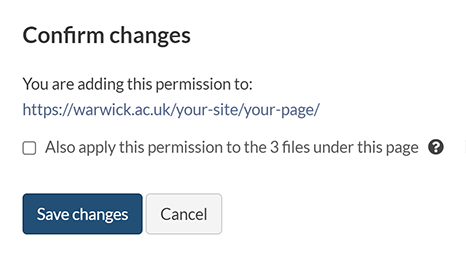
-
When you've finished editing permissions, select Done.
Remove permissions
The Current permissions section displays all the existing permissions on the page. Remove permissions from a user in the list by selecting the appropriate button:
-
Remove permission from page: Remove the user's permission from the current page only
-
Remove permission from page & sub-pages: Remove the user's permissions from the current page and all pages and files beneath it
When you're finished editing permissions, select Done.

