
Recording screencasts or videos in eStream
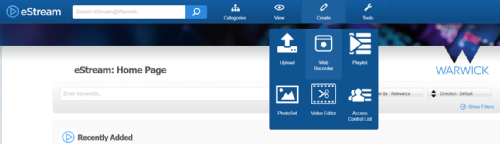
To record directly in eStream, hover over the Create button on the top toolbar and then choose Web Recorder from the drop down menu.
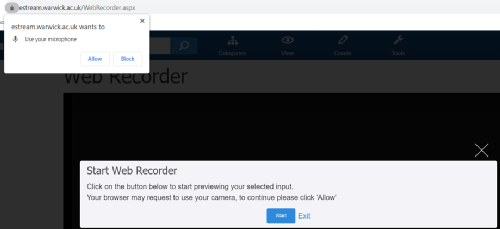
You may be asked to allow eStream to use your microphone and camera; click on Allow to confirm these permissions. Then click on the Start button.
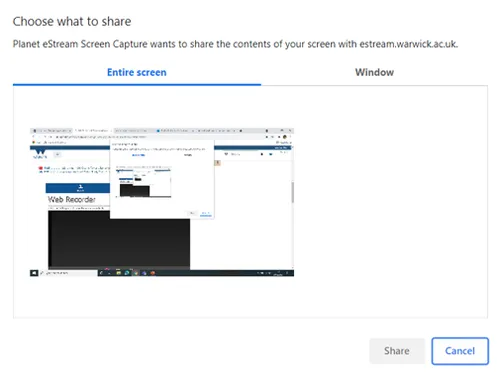
Choose to share either the Entire screen or a specific Window by clicking the appropriate tab and then click the Share button which will become active.
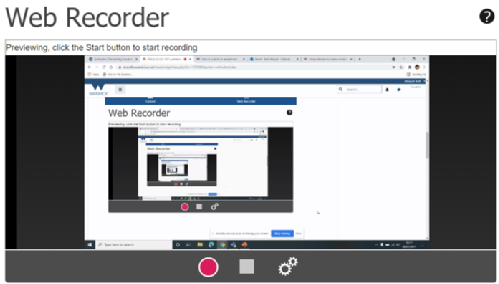
You will see a message at the bottom of your screen saying that eStream is sharing your screen. You can stop sharing at any point by clicking the Stop sharing button. The Web Recorder dialogue box will then appear showing what you have chosen to share as a preview. Click on the pink Start Recording button to start recording. Click it again to Pause recording or click the square button to Stop recording. The cog button allows you to change the recording settings but the default settings seem to work fine in most cases.
Once you stop recording you will be presented with the eStream Create new Recording dialogue box.
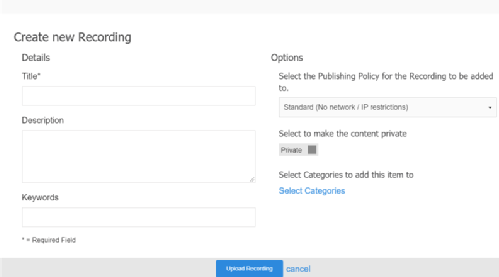
This will allow you to add your own title to the recording in the Title field. It is good practice to complete the Description field with a brief summary of the recording. You can also add keywords to the Keywords box which will help users (and you) to find your recording.
The Options dropdown menu has three Publishing Policy options:
- Standard (No network / IP restrictions)
- Internal Only (Restricted to Warwick network / IP range)
- Student content (no network / IP restrictions)
You should use option 1 if you want to generate an embed code to add the recording to Moodle or Mahara or to embed the recording in a public-facing web page. Use option 2 if you want to make the recording only available to devices on the Warwick network. Bear in mind that this will preclude users from accessing the recording off campus. Option 2 should therefore be used with caution. Option 3 should only be used if you want users to access the recording directly from eStream (i.e. if you don't want to embed it elsewhere). Option 1 is the default option and this gives the most flexibility access wise.
Ignore the Select to make the content private checkbox as this will make the recording only accessible and searchable to/by you.
Click on the blue Select Categories link. Expand the Faculty of Social Sciences menu by clicking on the + icon next to it and then tick the checkbox next to Centre for Teacher Education.
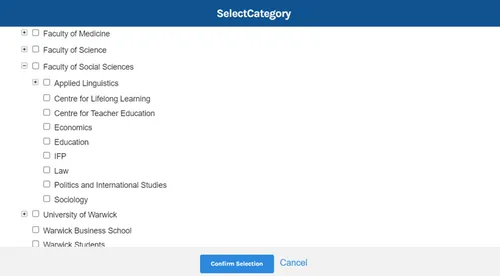
If you want other students to see this recording, you should also tick the Warwick Students category at the bottom of the list. Then click on the Confirm Selection button. Then click on the Upload Recording button to complete the process. Once the upload is finished you will get an email telling you that the recording is available.
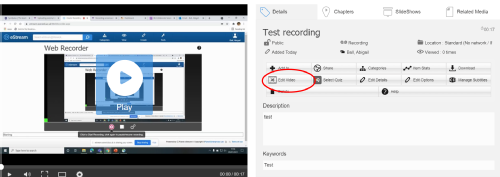
Editing recordings in eStream
Click on the recording thumbnail from your My Media list and then click on the Edit Video button.
Comprehensive guidance on using the editing interface is available here:
Additionally this YouTube video is a good place to start: