Add a password to a page or file
You can enable individuals who are not members of the University and do not have a University ID to view a restricted page by entering a password. To specify the password, you need admin permission for the page yourself.
Caution: Adding a password does not provide sufficient security for pages that contain sensitive information. When you share a restricted page with other University members, you must use SiteBuilder permissions. To share sensitive pages with individuals outside the University, we recommend that you:
- Request a Web External User account for the individual
- Add permissions for the Web External User via SiteBuilder permissions.
In this article:
- Add or remove a password for a page
- Add or remove a password for a file
Add or remove a password for a page
-
Browse to the page where you want to add a password.
Tip: To apply a password to an entire site or section, navigate to the home page or topmost page of the section.
-
Go to Edit > Edit page permissions:
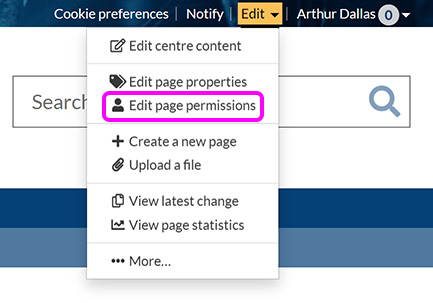
-
You see the Edit permissions screen:
A message in the Add a password section informs you whether This page is password protected. or This page does not have a password.
-
To add or change a password:
-
In the Add a password section, type your chosen password in the Choose password box, then type it again in the Confirm password box.
-
Apply the password by selecting the appropriate button:
-
Add to page: Add password to page
-
Add to page & sub-pages: Add password to this page and all sub-pages
-
-
Remove view permissions for the page (and sub-pages, if relevant).
-
-
To remove a password, select the appropriate button:
-
Remove from page: Remove the password from the current page
-
Remove from page & sub-pages: Remove the password from the current page and all sub-pages
-
-
-
When you have finished setting the password and view permissions, select Done.
-
Notify the group or individual to tell them the password. When they view the site, they are prompted to enter the password once, not for each page, per session.
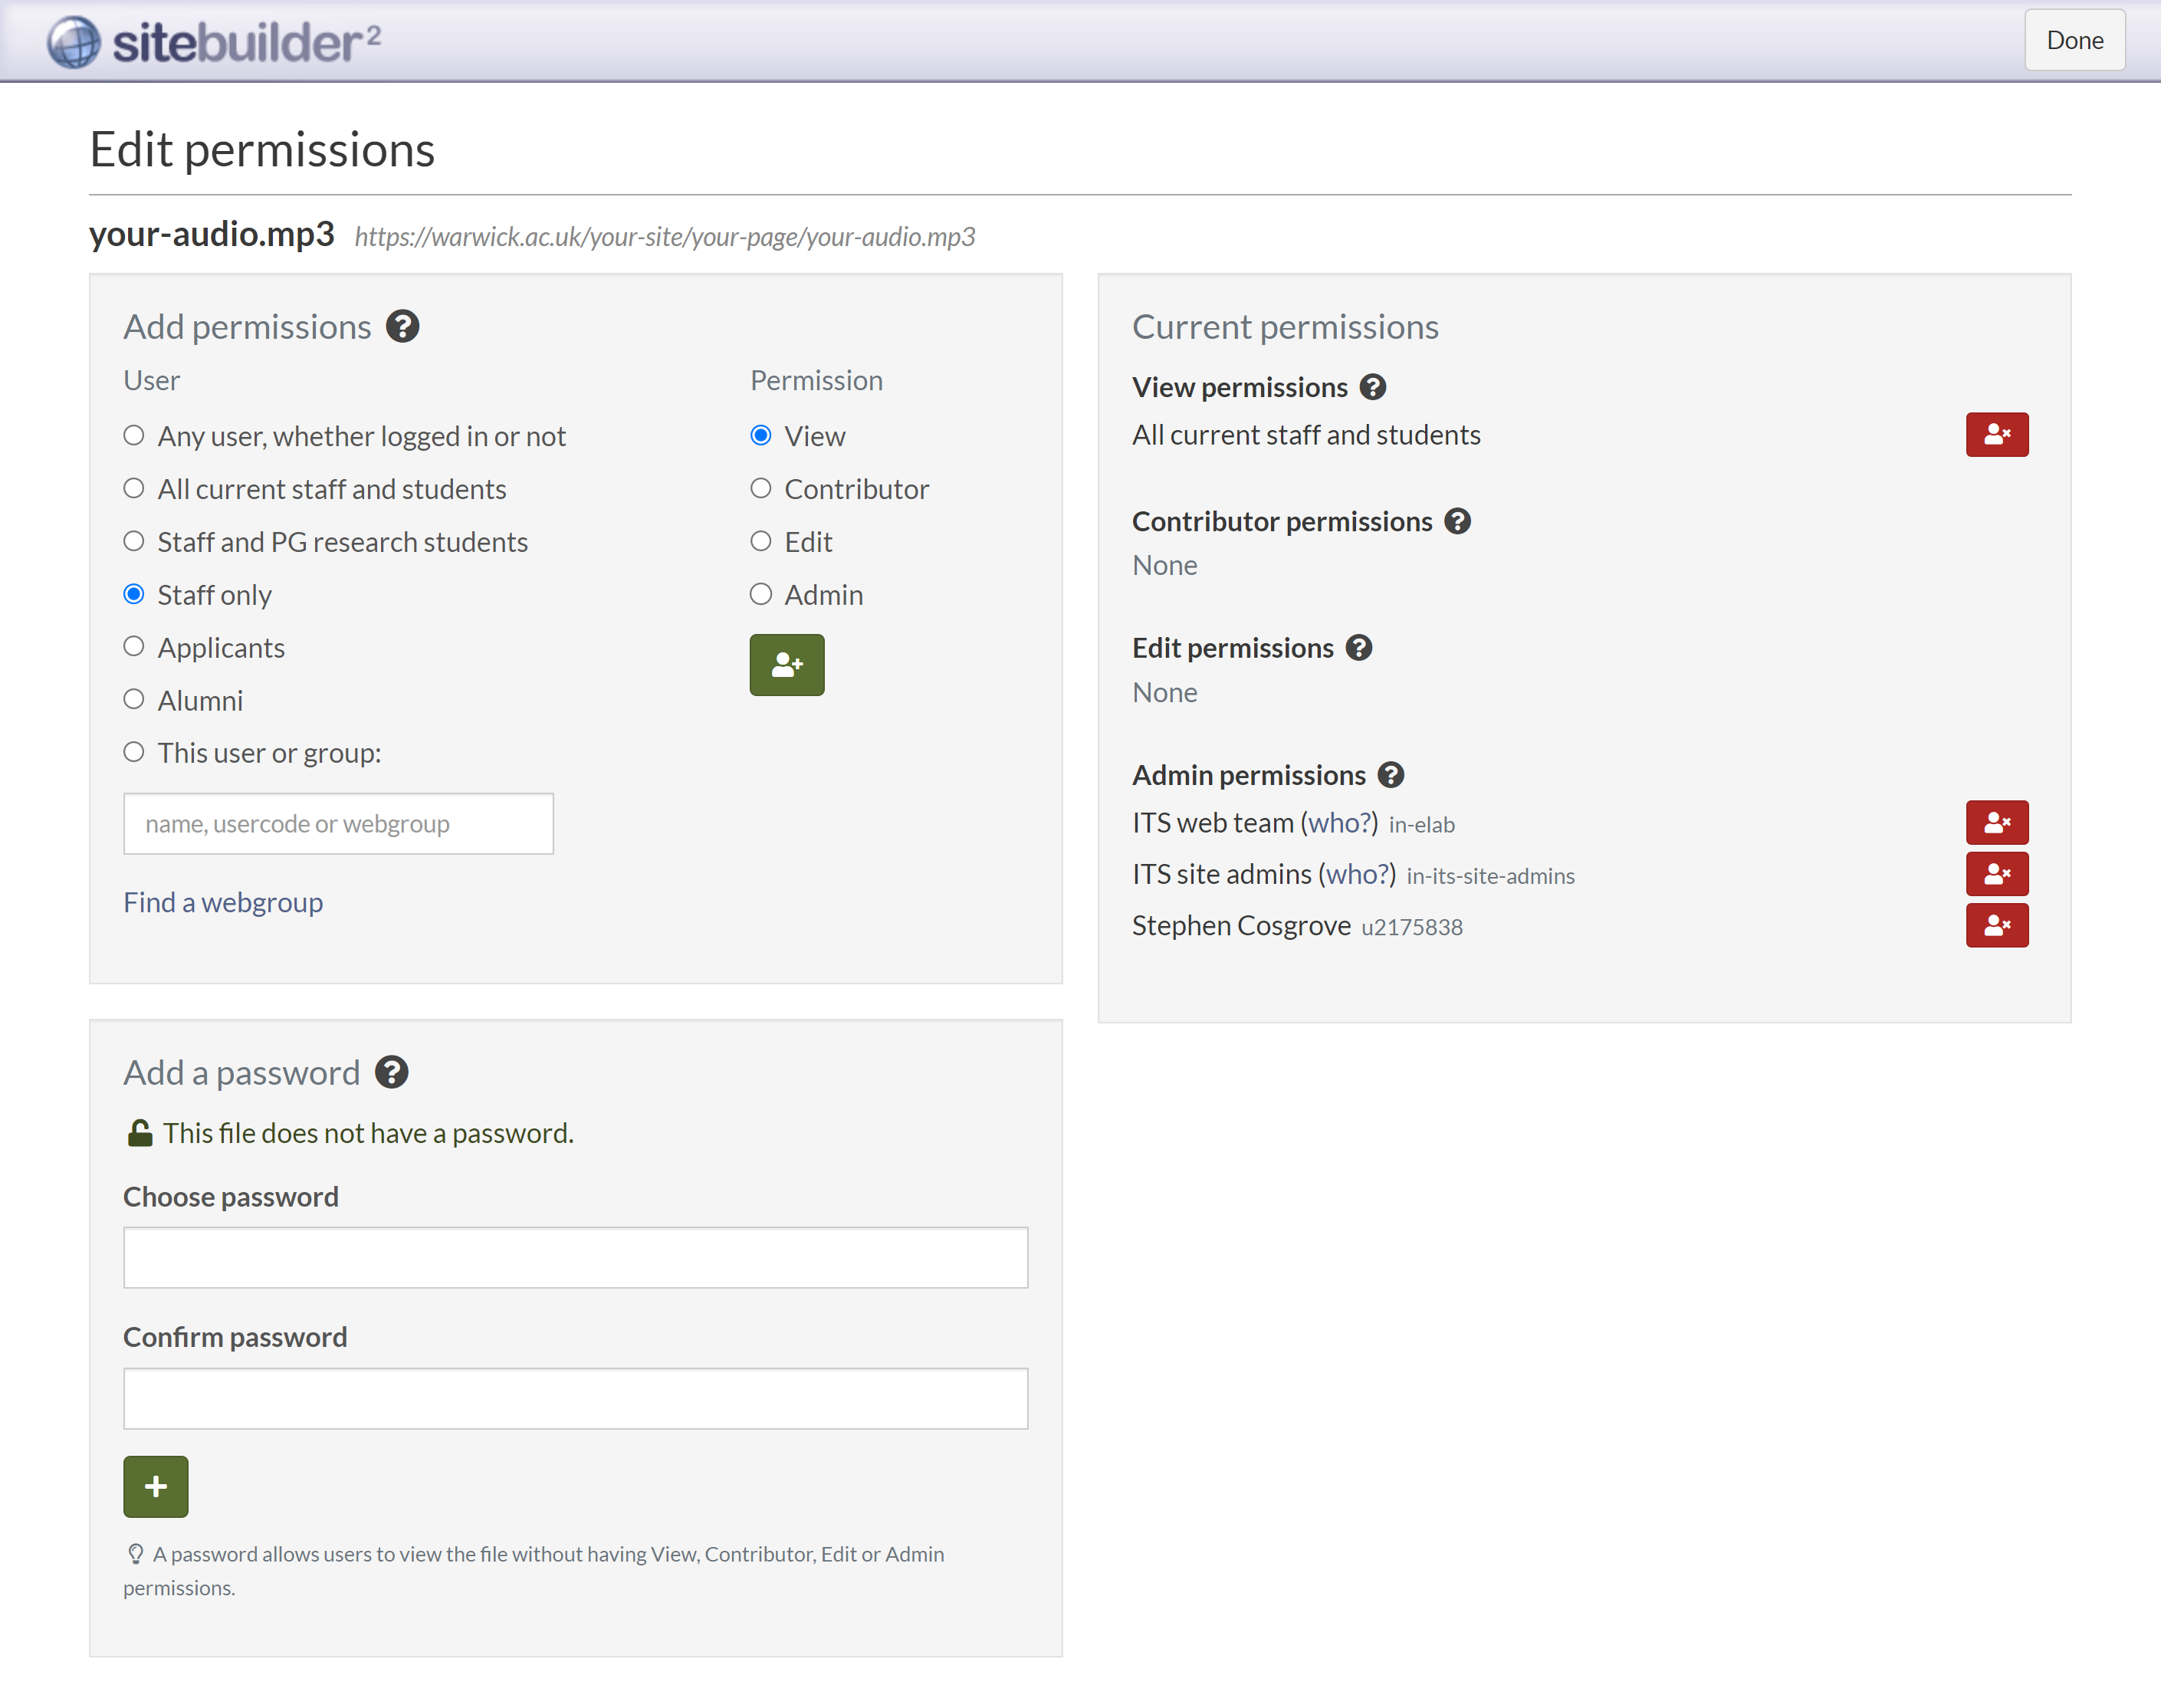
Add or remove a password for a file
-
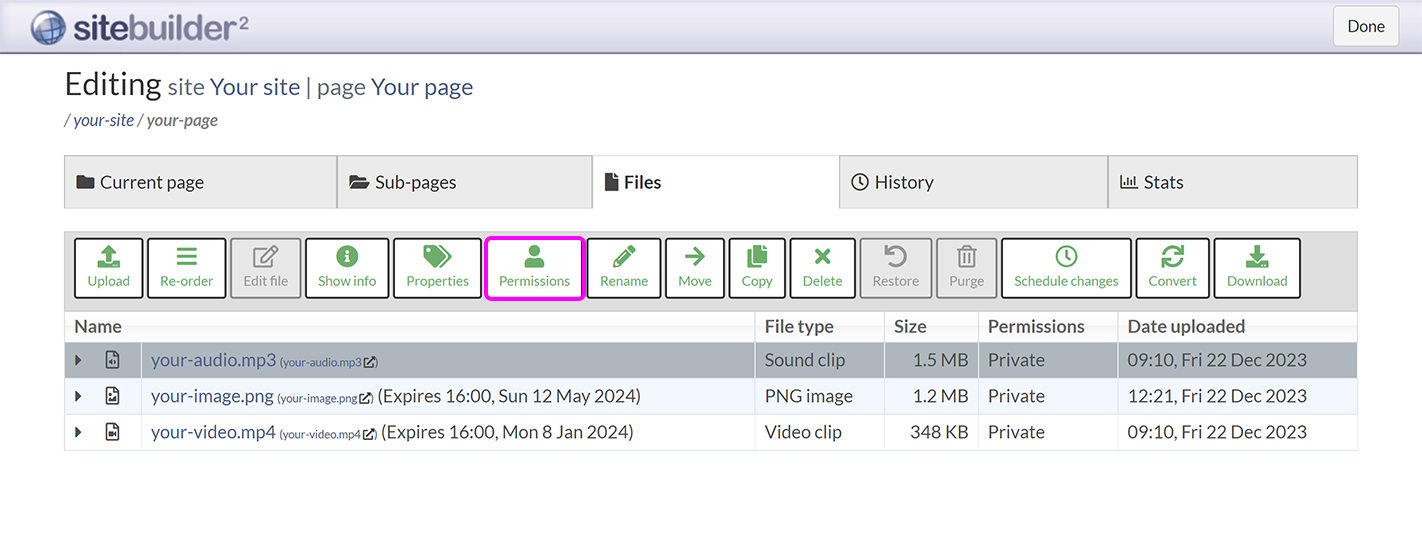
Browse to the page where the file is stored.
-
Go to Edit > More:
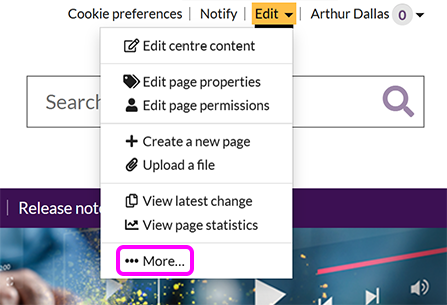
-
On the the Files tab, select the file in the list, then the Permissions button:
-
You see the Edit permissions screen:

A message in the Add a password section informs you whether This file is password protected. or This file does not have a password.
-
To add or update a password:
-
Enter the password you want to use in the Choose password box and the Confirm password box.
-
Select the Add to page button to apply the password.
-
Remove the file's view permissions, if required/
-
-
To remove an existing password, select the Remove from file button.
-
-
When you have finished setting the password and view permissions, select Done.
-
Notify the group or individual to tell them the password. When they attempt to view the file, they will be prompted to enter the password once per session.