
Options for generating transcripts or captions for online content
Please be aware that there is no one recommended solution for generating transcripts or captions for online content. Some software provide transcripts and/or captions automatically, but the accuracy of that output can vary considerably. Staff are responsible for checking the accuracy of any transcripts they use to support students with specific learning needs.
Echo360 (staff only)
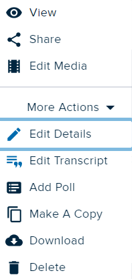
When a video is uploaded into Echo360 a transcript is automatically generated. The process takes about half an hour but at busy times (and for longer recordings) this can take considerably longer. To enable captions in Echo360 click on the three buttons on the recording thumbnail in your library. Choose More Actions and then Edit Transcript from the expanded menu.
Once in the editing interface you'll see the video displayed on the left and the automatically generated transcript on the right. To edit the transcript click on the Edit Transcript button at the top right of the screen. As you play the video, the relevant section of the transcript will be highlighted in blue. Make sure that the Pause when typing slider under the video is set to on (to the left) unless you are a super speedy touch typist!
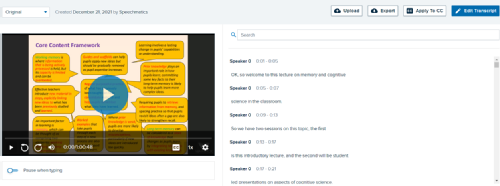
Once you are happy with your transcript click the Save transcript button (again at the top right of the screen) which will save a new version of your transcript. You then need to click on the Apply to CC button to apply the transcript as closed captions to the video. If you have already shared the video (either by embedding it into a webpage or via a link) you do not need to redo or change the link as the transcript and captions will appear within the video player interface.
From the editing interface you can also Upload a vtt file or Export the transcript as a txt or vtt file by pressing the relevant button. A vtt file is a text transcript file saved in the Web Video Text Tracks (WebVTT) format. Unfortunately you cannot upload txt files as transcripts. Only vtt files generated by other transcription software can be uploaded.
eStream
eStream does not automatically generate transcripts for videos recorded within it or for videos that you upload into it. You will need to create the transcript yourself either by uploading a .srt file which is a subtitles file or by manually typing text into the relevant window in the editing interface.
Click on the thumbnail of the video that you want to add subtitles to in your eStream dashboard and then click on the Manage Subtitles button on the bottom row, at the right hand side of the interface.
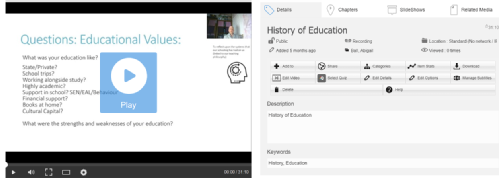
This will open the Manage Subtitles dialogue box. To upload a .srt file click on the Upload Subtitles File (.srt) link and follow the instructions on the screen.
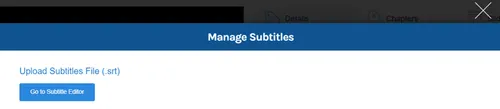
To manually add text, click on the Go to Subtitle Editor button. The video link below will explain how to add/edit your subtitles:
Google Chrome
Enabling live captions in Chrome is one of the simplest solutions as it works with any content delivered via the Chrome browser. This includes Blackboard Collaborate sessions.
Open a Chrome browser window and click on the Customise... button (the three dots) at the top right of the screen. Choose Settings from the dropdown menu and then Advanced from the menu on the left hand side of the screen. From the expanded menu choose Accessibility. The Live Caption option is the first item in the dialogue box that appears. Simply move the slider to the right to enable live captioning. There is no save button so just close the browser window when you have finished.
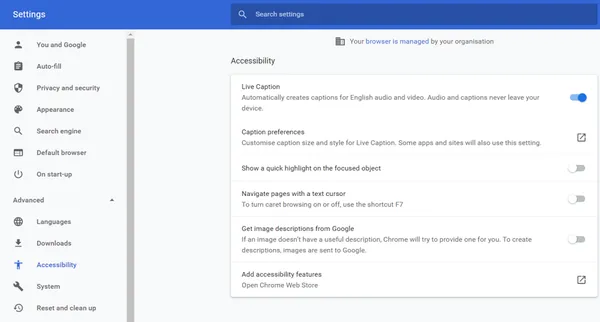
The captions will display in a pop up box when the audio begins.

Microsoft Teams
Please be aware that Teams provides a live captioning service which is only available during a live session and a transcription service that makes transcripts available for download after the session. If you use the live captioning service, once the meeting ends the captions are deleted.
Live captioning
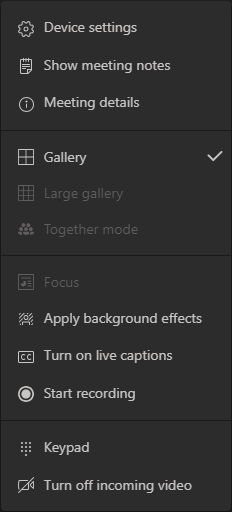
Click on the More options button (the three dots) on the toolbar at the top of the meeting interface.

Choose Turn on live captions from the dropdown menu. If you decide to stop using live captions go back to the same menu and choose Turn off live captions. Any meeting participant can do this and the captions will only be displayed to that individual participant.
The live captions will be displayed at the bottom of the Teams interface. Please be aware that sometimes live captions can be difficult to read (particularly if presenters are sharing content (e.g. presentations) with very full pages) so this may not be the most suitable solution for your needs.
Transcription
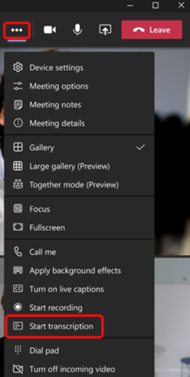
Start your online session and click on the More options button (the three dots) on the toolbar at the top of the meeting interface. Only meeting organisers and presenters can start and stop the transcription process.
Choose Start transcription from the dropdown menu.
The transcript will be visible for all meeting attendees in a panel on the right hand side of the Teams interface.
If you decide to stop the transcription process go back to the same menu and choose Stop transcription.
Otter.ai
CTE has one Otter Pro licence that CTE staff can use to provide live transcripts and record longer sessions. Please email cte-technical@warwick.ac.uk to ask for the login details. Be aware that only one person can logon at a time and currently the Digital Teacher Education Project: Mentoring strand has priority.
Otherwise you can sign up for a free basic Otter account where you can record up to 600 minutes a month and share live transcriptions for up to 30 minutes at a time. Otter is straightforward to use and the accuracy of the transcripts or captions produced is very good. To transcribe an online session, simply login to your meeting room as usual. Ensure that you play the meeting audio through your device speakers, do not use a headset. Open Otter in a new browser window and once you have logged in, simply click on the 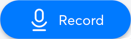 button. Avoid generating any background noise as this can make the transcription less accurate.
It is good practice to have the meeting interface open in one browser window and the Otter interface open in another as this will allow you to periodically check that the transcription is still in progress and to pause the recording if you need to.
Once the recording has started, you can share the live transcript with individuals via a link. Click on the  button (the share button). Then click on Create a link and then Copy link. Then simply share the link with others via email, in the meeting chat or on a website.
Further information about Otter.ai is available here: https://otter.ai/homeLink opens in a new window
PowerPoint
When you create a PowerPoint presentation you can enable captions or subtitles that will appear on the screen as you present. This will only work if you have a Windows 10 device and are running PowerPoint for Office 365 version 16.0.11601.20178 or higher. It will not work if you are using older versions of Office (or Mac versions). You will also need to have a reliable internet connection throughout your presentation. This is because the captions and subtitles facility is one of the cloud-enhanced features of Office 365. Please be aware that what you say will be shared with Microsoft and that this process is powered by Microsoft Speech Services.
If you want to run your presentation with subtitles through Blackboard Collaborate, you will need to use the screen share option, not the upload file option.
Once you have created your presentation, click on the Slide Show tab and then click on the down arrow next to the Subtitle Settings button.
The image below shows the dropdown menu options:
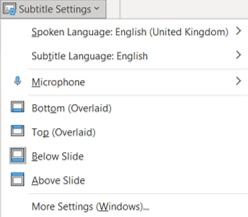
Spoken Language: English (United Kingdom) - click on this to see the language options available and select the one you want to use. This is the language that you will be giving your presentation in. By default, this is the same as your Office editing language (which in most cases at Warwick is English (United Kingdom)).
Subtitle Language: English - click on this to see which languages PowerPoint can display as captions or subtitles and select the one you want to use. This is the language of the text that will be shown to your audience. By default, this is the same as your Office editing language (which in most cases is English (United Kingdom)) but it can be a different language (i.e. PowerPoint can translate your presentation for you).
Microphone - this will display the available microphones on your device. Just check that you are using the correct one before you start your presentation. PowerPoint recommend using a headset to avoid background noise and reduce interference (which can reduce the accuracy of the captions/subtitles).
Bottom (Overlaid), Top (Overlaid), Below Slide and Above Slide are the available locations for your captions or subtitles. Check your presentation to see where there is space to display these and choose the most appropriate location. The default setting is Below Slide.
More caption/subtitle appearance settings are available by clicking the More Settings (Windows)... option. Here you can change the font and background of your subtitles, dim the window content and check your video playback settings. It is good practice to check this (particularly the font options) before your presentation to ensure that the captions/subtitles are clear and not interfering with the content on the slide.