
Glossary
The glossary activity enables staff and students to create and maintain a list of definitions, useful terms and acronyms relevant to their module or programme of study. Staff can automatically add entries to the glossary but students have to be given permission when the activity is first created to add entries. Student entries can be moderated or unmoderated.
Adding entries to a glossary
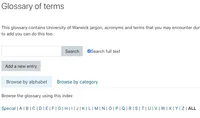
If you have been given permission to add entries to a glossary you will see an Add a new entry button at the top left of the glossary page when you click on its title.
Click on the Add a new entry button and then click on the Expand all link at the top right of the screen to expand all of the fields. What fields you see will depend upon how the glossary has been set up, but the example below has most of the generic fields available.
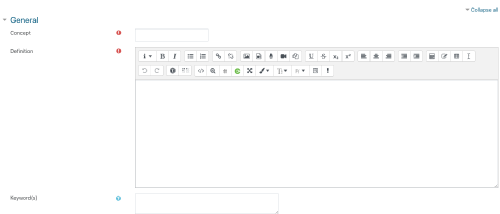
Give your entry a title by completing the Concept field. Try to keep this succinct and relevant. If someone has already added an entry with the same title you will not be able to save your entry, as most glossaries are set up to not allow duplications.
Complete the Definition field. You can include text, images, audio and video files as well as links to other websites within the definition field. Further information on using the HTML editor toolbar in this field, is available here.
Keyword(s) (or aliases) are a list of related terms that have the same definition as your concept. If you have set up auto-linking (see below), keywords will also link to the definition you add. To add multiple keywords press the return key after each item so that each keyword appears on a new line.
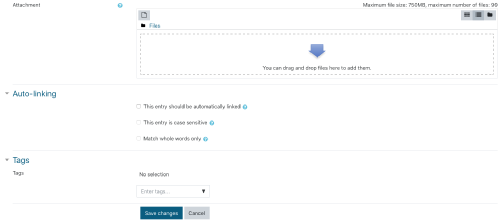
You can add attachments to your definition using the Attachment pane. Either drag and drop files from your desktop onto the pane or click on the Add... button (it looks like a little page) to locate your file. You can add as many files as you like but you will have to add each one separately. Please ensure any file you share is either yours to share or is available via a Creative Commons licence.
Auto-linking will create a link to your definition wherever the concept appears on the Moodle space. Tick the This entry should be automatically linked checkbox to enable this. If your definition is case sensitive (such as an acronym like RSPCA) then you can enable the This entry is case sensitive checkbox. This means that only entries matching the exact case you use will be auto-linked. This is useful if you have an acronym that is also a normal word such as CARE (package) which stands for Cooperative for American Remittances to Europe and care. The Match whole words only checkbox does exactly what it says on the tin; it only matches whole words. Again this is useful if you have words that form parts of other words (e.g. synchronous and asynchronous - in this example ticking the box would stop the synchronous part of asynchronous being linked to your definition of synchronous).
You can leave the Tags field empty and then click on the Save changes button to complete the process.
If the glossary has been set up to allow unmoderated entries then your entry will be displayed immediately under the appropriate letter of the alphabet on the Browse by alphabet tab. If the glossary only allows moderated entries then a Teaching Fellow will have to authorise your entry before it displays on the tab.
Commenting on entries in a glossary
If the glossary has been set up to allow comments you can add comments to entries. Simply click on the Comments link under the entry to add a new comment into the textbox that will appear. Click on the Save comment link to complete the process.
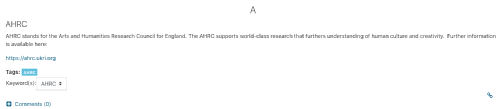
Any existing comments will appear as a number in the brackets and display in chronological order when you click on the Comments link. Please note that Teaching Fellows can (and will) remove inappropriate comments.