Setting up delegate access - Outlook 2013
This is useful if you want a collection of people to be able to see and respond to emails coming into an account (usually a resource account). It is also possible to set 'Send As' permissions so people can respond as if they were directly logged into the (resource) account (however you will need to contact IT Services to set send as permissions).
If you want a collection of people to just have access to a particular folder of any account, then you do not have to set delegate access to do this. See instructions on how to share folders.
Instructions are provided below on setting up delegate access to an account from the Outlook client. Alternatively you can contact IT Services to help you set up delegate access.
 Log directly into the account you wish to give delegate access to.
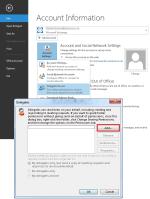
- From the FILE Tab, Select Info, Account Settings, Delegate Access (see screenshot).
- Click the Add button.
- The Add Users dialogue box will open. Select the Delegates from the Address Book.
- Click OK.
 Assign the relevant permissions for each of the available options (see screenshot).
- Click OK.
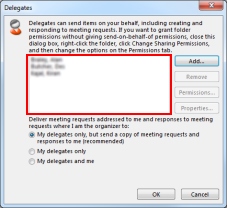
- The delegates will now appear in the Delegates list, choose the appropriate option about delivering meeting requests you wish to assign and click OK (see screenshot below).
- As part of the above instructions if you have chosen to give access to the inbox and there are other folders you would like your delegates to see, then see sharing folders for further instructions.