A Worked fMRI Example

is a SPM toolbox developed by Wen-Lin Luo & Tom Nichols
| Introduction | Example Data | Manual |
Introduction
SPMd is a toolbox for SPM which you to establish the validity of inferences in fMRI modeling through diagnosis of linear model assumptions, and to characterize fMRI signal and artifacts through exploratory data analysis. It allows for models:
- Single session
- One or more conditions
- Extra "nuisance" variables
- With/without high pass filtering
- With/without global scaling
There is essentially one key restriction for SPMd with SPM2 (for historical reference, SPM99 limitations are also listed):
- No multiple sessions
- No low pass filtering (only for SPM99; n/a for SPM2)
- No intrinsic correlation (only for SPM99; OK in SPM2)
The reference is: Luo, W-L and Nichols T. E. Diagnosis and Exploration of Massively Univariate fMRI Models. NeuroImage,19:1014-1032, 2003.
In this section, we analyze a single-subject block design fMRI data with the SPMd software.
Note: We assume you already have a model for this dataset, which users need to run the SPM analysis for the data before using SPMd! We also assume you have already had realignment file (*.txt or *.dat) for the dataset!
The aim of web page is:
- Give an example to demonstrate the steps of an SPMd analysis by analyzing the fMRI data.
The Example Data
This data is from a study on faces and houses repetition effects in implicit and explicit memory tests.
In this study, one volunteer participated in the experiment. Faces of different male and female faces and different style houses were presented to the subjects for 2s (?). If the picture is different than the previous one, click the thumb on the check board, otherwise click index finger on the check board . The subject was scanned during the experiment and his or her fMRI images were obtained.
You need to register an account at http://www.sph.umich.edu/~nichols/SPMd/spmdreg.html before downloading the SPMd software.
- Follow the instructions on the above web page to download and install SPMd.
- CDing a directory in which you save all SPM analysis results,
- In Matlab, if you have SPM99 and SPM2, please type
> SPMsel(2)
> spmd
If you only have SPM2, please type
>spmd
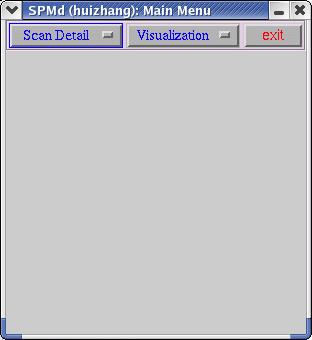
SPMd is split up into two components (1) Compute (2) Visualization.
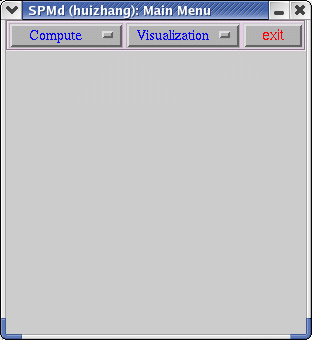
First click on
There are three choices in Compute, (1) Model summary (2) Scan summary (3) Scan detail.(1) The following interface will appear after clicking on "Model Summary"
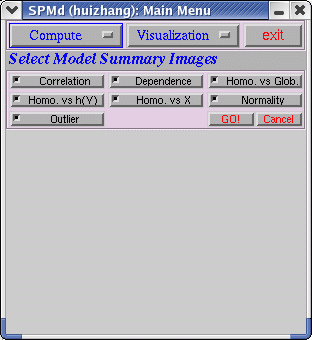
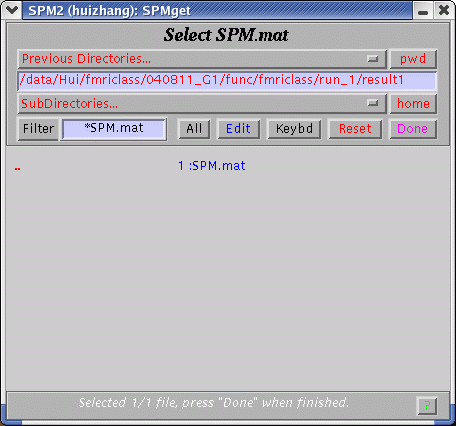
After clicking "GO!", a pop-up window will let you choose the SPM.mat file that you explore the data and diagnose the statistical analysis.
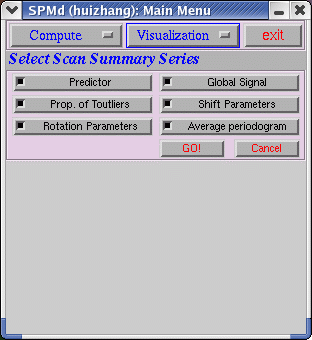
(2) The following interface will appear after clicking on "Scan Summary"
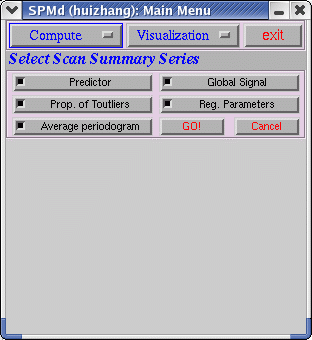
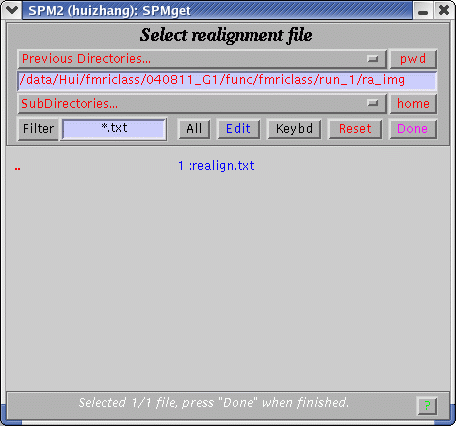
Before run "Scan Summary", the users run SPM and "Model Summary" first. After clicking "GO!", a pop-up window will let you choose the realignment file that you explore the data. If there is realignment file in the current directory, the software will do computing.
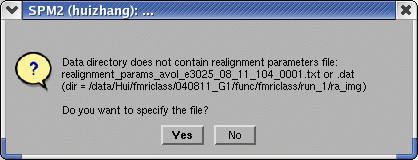
If choosing "No", in the "Scan Summary" window, the time series of realignment parameters will not be shown. If choosing "Yes", a pop-up window will let you specify the realignment file
(3) The following interface will appear after clicking on "Scan Detail"
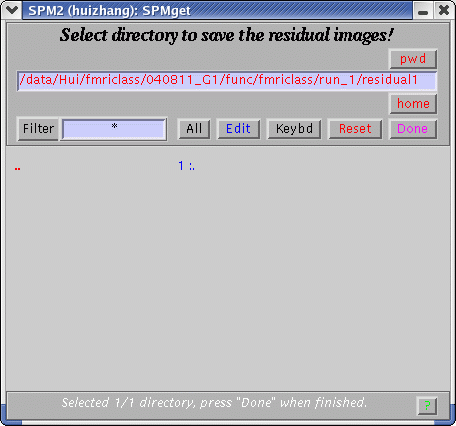
A pop-up window will let you specify a directory to save residuals' images.
This is a time-consuming section. It will cost 20 minutes or based on the users' computer system to finish all computing.
Second click on
Visualization
There are four choices in Visualization, (1) Scan Summary (2) Model Summary (3) Model Detail (4) Scan Detail.
(1) Scan Summary
Select summaries the users are interested in, or just click "GO!" get them all. This is an example for selecting all.

The user can specify the scan number by clicking on specified point in the top 5 plots.
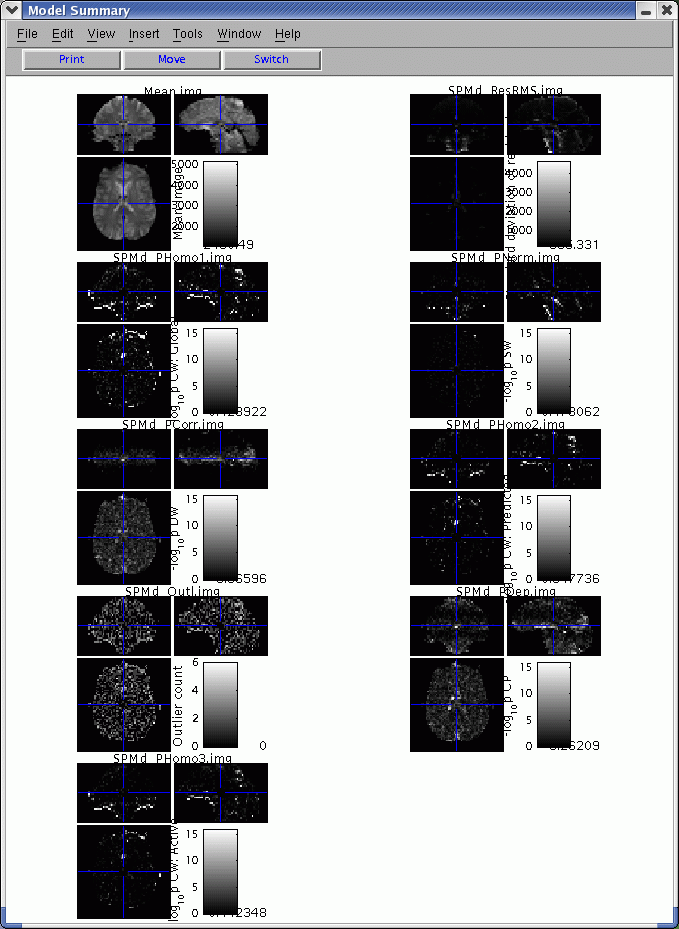
(2) Model Summary
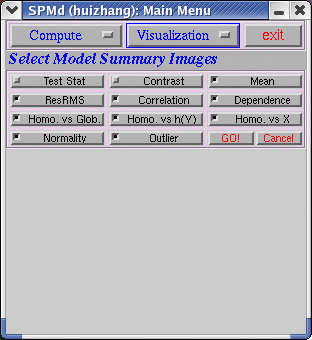
The users have to DESELECT "Test Stat" and "Contrast" if there are not contrast and t images in the directory, otherwise, the software will crash. After selecting summaries the users are interested in, or just click "GO!" get them all. This is an example for selecting all except "Test Stat" and "Contrast".
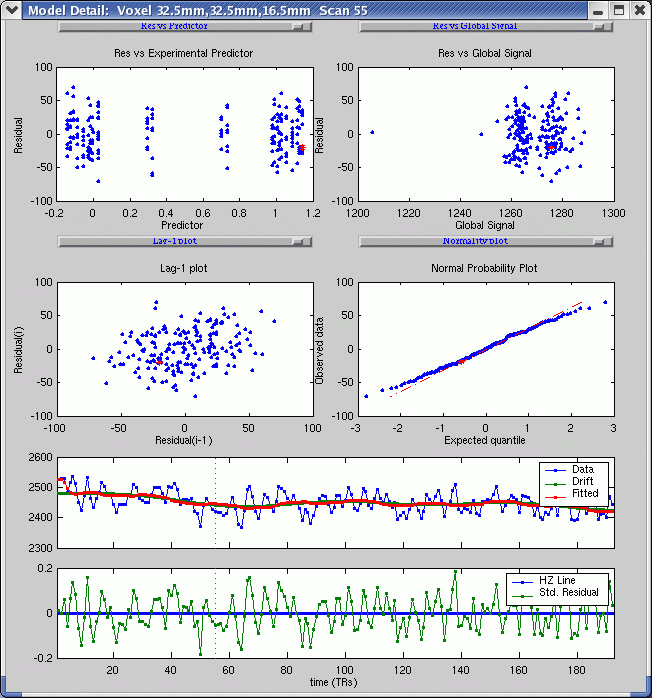
(3) Model detail
For an interesting voxel, right click that voxel in "Model Summary" or click "Model details" button inside the "Visualization" menu, the following figure is the result.
Before calling model detail, there should at least one spatial window opened, so that the spatial position could be specified. If both spatial window exist, this function will automatically select the spatial position in the most recently clicked spatial window.
This figure includes 6 diagnostic plots:
-
Residual vs experimental predictor
-
Residual vs global signal
-
Absolute value of residual vs. experimental predictor
-
Absolute value of residual vs. global signal
-
Lag-1 serial plot
-
Normality plot
and 2 time series plots:
-
Raw data, drift, and fitted data
-
Standard residual vs horizontal line
Users can select any point in one plot, the corresponding point in other plots will be selected.
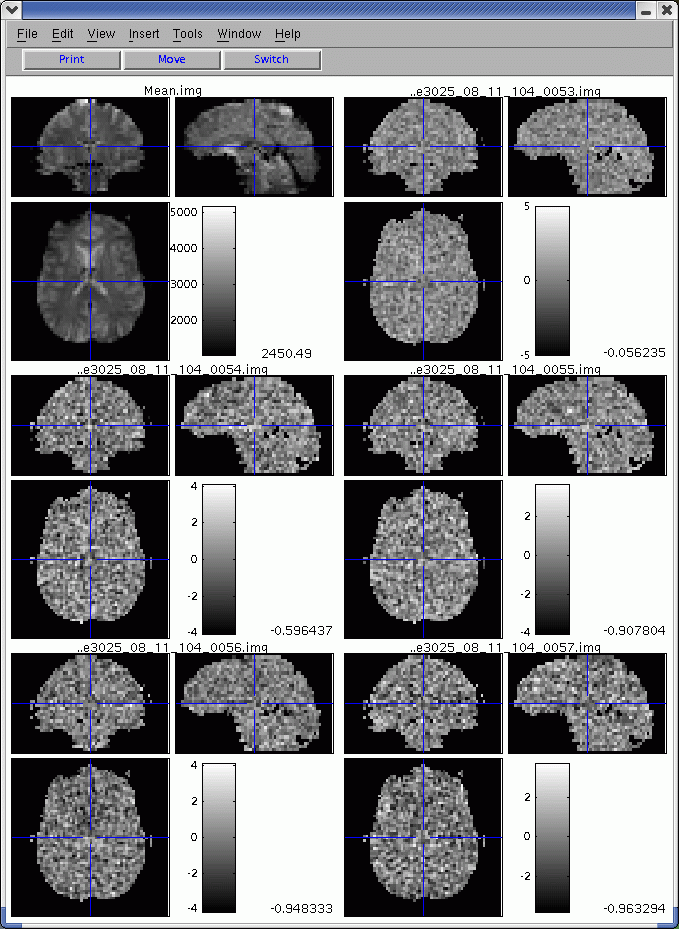
(4) Scan Detail
For an interesting time point, click "Scan Detail". This will bring up the residual images just before, during and after the point of interest. (If you did not create residual images, you will get a warning and will see the raw data images instead).
Before calling scan detail, scan summary window should be opened.
We are looking forward to your feedback... don't be shy! Email us both at spmd-authors@umich.edu.
- Back to main SPMd page
- SPMd by Wenlin Luo & Tom Nichols of The University of Michigan