Sunlight Sensor
Sunlight Sensor & Extra Micro:bit Features
Activity Overview
Previously we’ve used our micro:bit to record voltage data and store it on our computer to plot a characteristic curve. In this exercise we will begin testing some of the other functionalities of the micro:bit – in particular the in-built sunlight sensor. The LEDs on the front screen can emit light to form a pattern (as we’ve seen before), but they can also harvest incoming light and convert it into an electrical signal.
You Will Need
- The Fully Electric Challenge Pack, specifically:
- BBC micro:bit GO Pack
- A computer/laptop with internet access
- MakeCode app (preferred) or MakeCode open in your browser
- Your kit car from yesterday
Get Coding: Basic Example
To start, we are going to create a simple example where we detect the light level on the micro:bit’s LED screen and display two different patterns depending on how much light is detected.
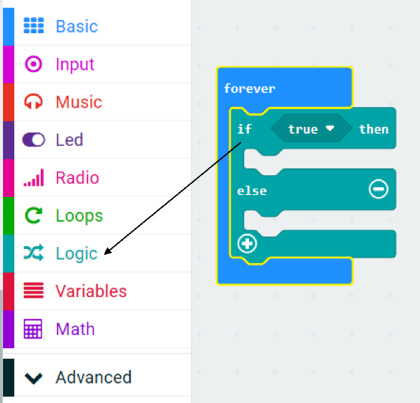
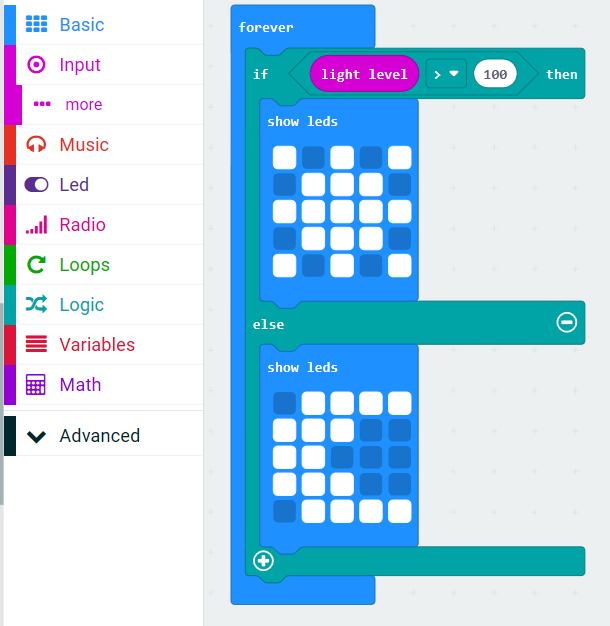
Step 1: Create a new MakeCode project, delete the on start block and input an if/else block from the “Logic” module:
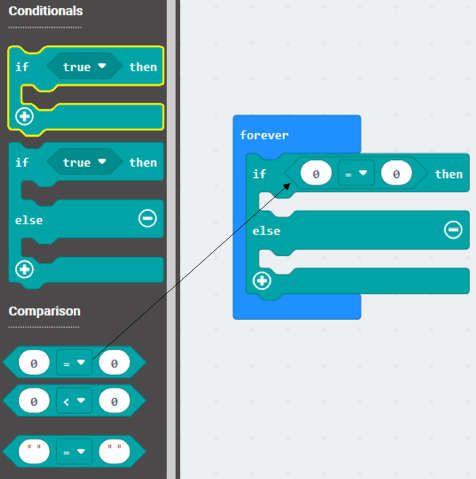
Step 2: Within the “Logic” module, drag a “0 = 0” block from the comparison section and drag it into the hexagonal “true” box:
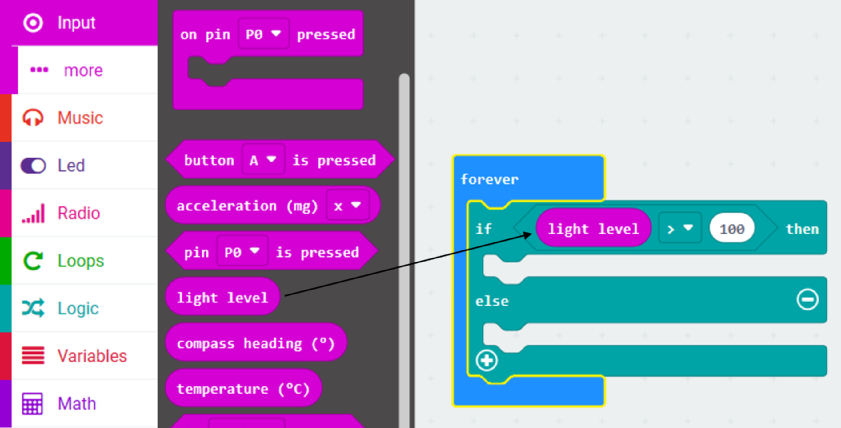
Step 3: Drag the round “light level” block from the “Input” module to the left hand side 0. Then type in 100 into the right hand side 0 and change the operator from equals “=” to more than “>”:
Step 4: Drag two “show leds” blocks from the “Basic” module, one to be placed under the if statement and the other under the else statement. You can customise which LEDs light up however you want, I have chosen a sunny looking pattern for light levels above 100 and a moon pattern for when it drops below 100:
Our basic example is complete! If you press download as before with the micro:bit connected via USB to your computer, your program will be saved onto your micro:bit. If you are in a bright room and your micro:bit is showing a sunny pattern to begin with, try covering the LEDs and you should see the pattern change over. Alternatively, if you are in a darker room you can use your phone torch to illuminate the screen. It’s now time to add some extra features to our program!
Upgrading Our Program
By implementing a few extra blocks, we can upgrade our program to display animated patterns! Since the micro:bit has an on-board speaker, we can also play single notes or custom tunes depending on the incident light level.
Animating our screen
By including “pause (ms)” blocks from the “Basic” module and adding extra “show leds” blocks we can very simply create an animated gif for each of the two scenarios:
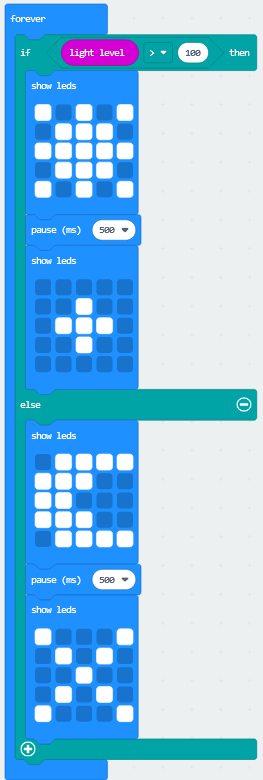
Note: Feel free to add as many layers to the animation as you want!
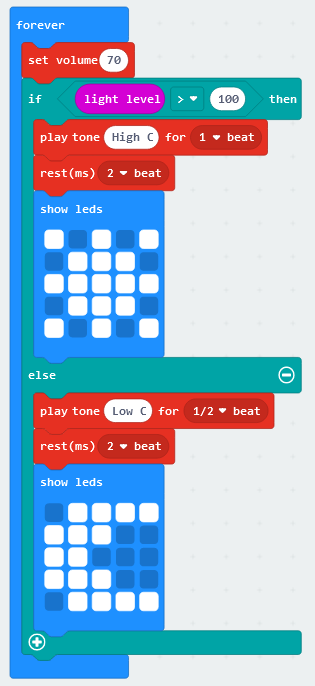
Adding sound
After poking around in the “Music” module you will see you have the option to play a musical note, a custom melody and even change the tempo/volume of your sounds:
Final step: Once you are happy with your program and you have tested it works correctly – you may unplug your micro:bit from your computer and attach it to your kit car with the battery box provided. You have now created a mobile sunlight sensor which can annoy everyone in your household!
Bonus Tutorials
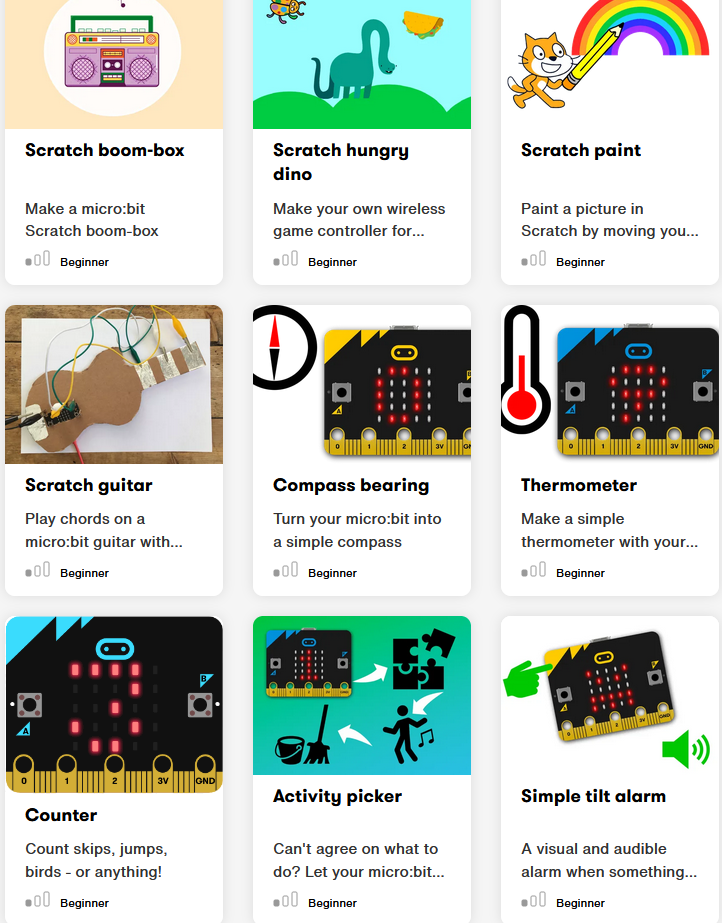
If you are interested in further examples of what your micro:bit has to offer, feel free to visit the link below in your spare time and browse an extensive list of tutorials. Some extra features of the micro:bit that weren’t covered today include a microphone, temperature sensor, compass, accelerometer, and many others!
https://microbit.org/projects/
Here is a sneak peek at some of the projects you will encounter on the website…