Fully Electric Challenge - Kit Car Building
Kit Car Building
Activity overview
Based on the decisions made in your breakout groups, you are tasked with the design and build of a vehicle to meet your assigned customer profile. You will work as a team in breakout rooms to discuss ideas and decide on a design that you will then pitch to your peers as a group on Friday. Use the instructions in this pack as a guideline, but feel free to be creative and try alternative combinations of wheels and positioning.
Challenge
- Build a battery-powered car to meet your design requirements. This will be either a more family friendly car, a performance car or an aerodynamic eco-car
- Race your chosen car and make requirements to improve it
- Work as a team to put together a pitch of your vehicle design, using your kit cars as a prototype model
Equipment
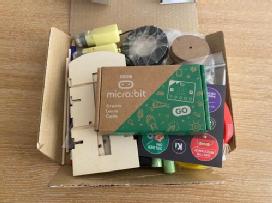
In order to start building prototype vehicles you need to gather together all the required equipment. You will require all of the components included in the Fully Electric Kit.
Preparing your Presentation
Suggested Presentation Headings - These headings are only suggested points and are not fixed!
- [Group Name] Design Pitch – Opening Slide
- Vehicle you were assigned – Don’t forget to create a company name!
- Vehicle parameters – Motor performance, drag coefficient, mass, will your car have?
- Simulation Results – Acceleration curve created from the vehicle parameters
- Additional Features – Use what you’ve learnt on the course to justify
Comfort features?
Charging features? (Electric ecosystems)
Recyclable materials?
Different battery chemistries?
- Thank you & Questions – Closing slide
Safety
- Try not to work alone - ask an adult to help you if you need it
- Warn people around you about what you are going to do
- Keep the area you are working in tidy - most injuries happen from slips, trips and falls!
- Keep hair tied back to avoid getting caught in moving parts.
- Read all the provided instructions before starting to build
General Building Instructions
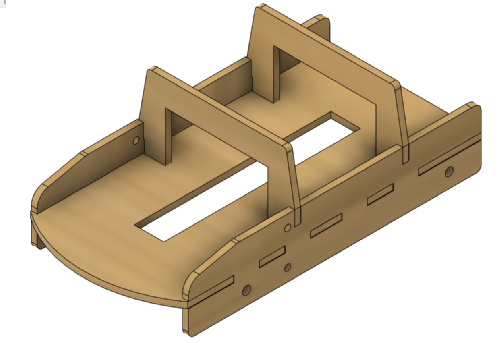
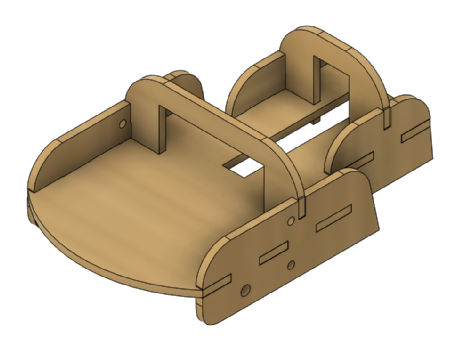
- Attach side panels and arches to chassis panel. As you start to add components, you may find it easier to attach them with the chassis disassembled. Note: Due to manufacturing & material tolerances, your chassis may be slightly loose. Try utilising the elastic bands that were used as packaging in the original box, you may find this improves stability – alternatively, electrical tape wrapped around the width of the chassis can work well.
- Attach the yellow motors to the side panels with long screws and nuts provided. Push on the yellow wheels securely, they can be quite stiff!
- Thread the wooden axle through the rear side panels and push on the MDF wheels so the chassis is balanced. To better secure the wheels on the axis you may want to use an elastic band as a stopper.
- Attach the jumper cables to the motors by carefully hooking and bending them through the metal loops on the motor. You will find it more reliable if you use electrical tape to secure the jumper cable to the motors.
- Before continuing with assembly, test the circuit to ensure the batteries and motors are working. Be careful and do not connect the batteries to each other! This can cause smoke!
- Once you are happy with your circuit, position the breadboard and battery holder on the chassis in suitable place. Note: If you are attaching the 3x AA battery holder, make use of the 10mm M3 screws (the shorter ones) and fasten to the centre of the chassis with the nuts.
- Once the chassis is secure and all the wheels are in position use the breadboard to create a circuit and connect the battery power source to the yellow motors.
Building Guidance
Breadboard
A breadboard is a board used for making an experimental model of an electric circuit. These circuits can act as a prototype for many electrical circuits with batteries, switches, LED lights, resistors and more.
They can be useful to avoid the need for soldering and to be able to make changes to wiring for more complex configurations. You will use a breadboard when connecting the motors to the batteries.
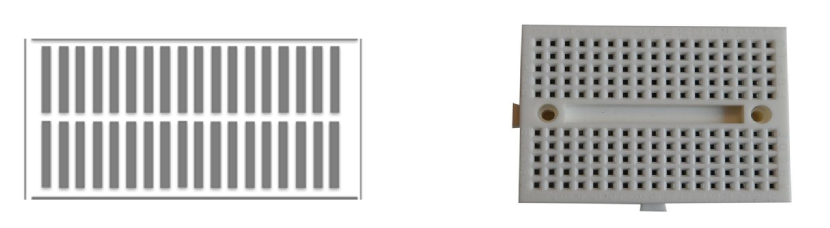
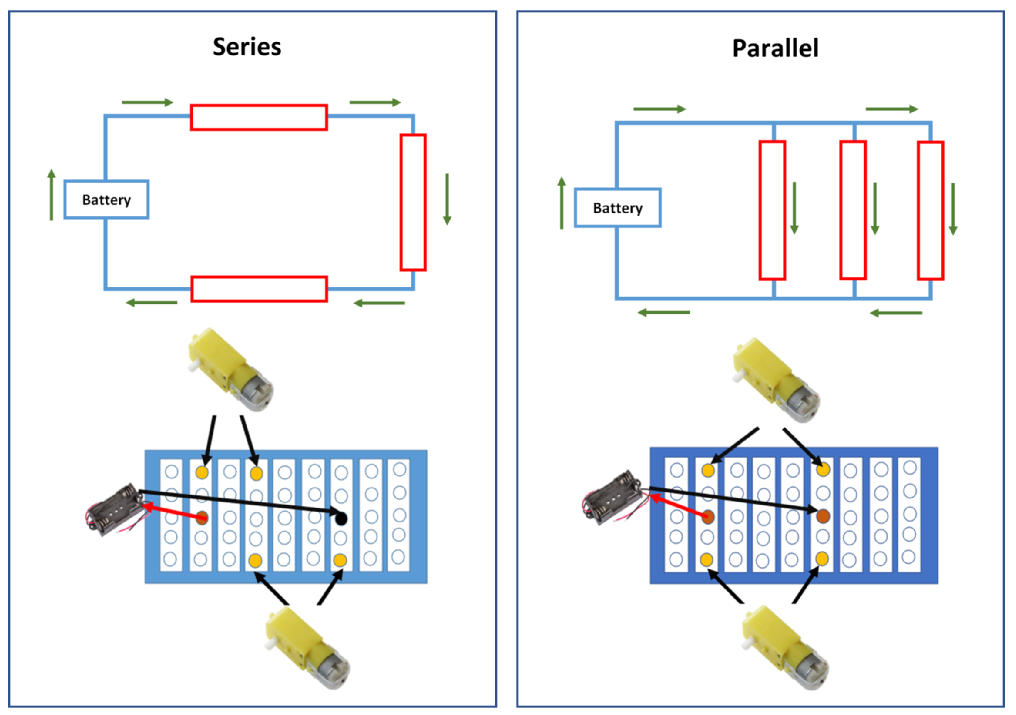
How you connect your components up on the breadboard can change the performance of your vehicle. It is important that your circuit is complete otherwise your motors won’t run. Watch out for short circuits! As we have two motors (one connected to each rear wheel) we also need to consider whether we will connect these to the batteries in series or parallel.
Connecting the components on the breadboard in parallel or series can impact the voltage and current through each component (this is critical in electric vehicle battery pack designs!) Remember:
- Components connected in series (consecutive in a particular loop) can experience the same current but share voltage
- Components connected in parallel can share current but experience the same voltage
- Think about which method will be best to connect your two motors to your batteries in order to achieve optimum power
Be careful not to Short Circuit!
If the batteries in your circuits get connected to themselves this could cause a short circuit. Always test your circuits before attaching to your car and watch out for the signs of a short:
-Batteries getting hot quickly
-Smoking from your cells
-Smell
Breadboard Top Tips:
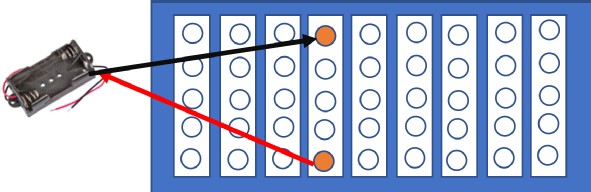
- If you are finding it fiddly to keep re-connecting the battery to start the vehicle, have try removing one of the battery cables from the breadboard instead?
- If a jumper cable cannot reach a long distance, you can use another cable to bridge the gap - just be careful that you do not short the circuit!
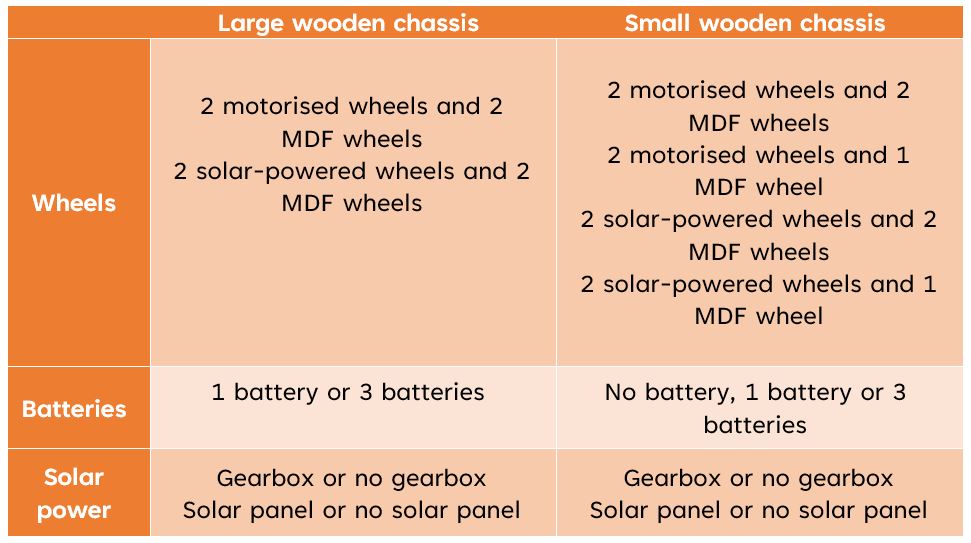
Deciding on a Layout
There are two main sizes or layouts to choose from: the large wooden chassis or the smaller wooden chassis. Using all of the components, design and prototype a battery-powered car that meets your design requirements. Always keep in mind why you are choosing each component!
Evaluation Questions
- Why is it important to prototype cars or have concept cars in automotive design?
- Given your dream budget, what materials and gadgets would you use to scale up your prototype to a life-sized vehicle?
- When a car brakes or stops, where does the energy go?
Stretch Challenge – Build a Solar Vehicle
NOTE: The operation of the solar panel and motor is dependent on many conditions such as weather. Think about this when you weigh up the advantages and disadvantages of using solar power in automotive applications!
- Attach the red and black wires of the solar motor onto the inner connection points on the solar cell using tape.
- To check the operation of solar motor and solar panel: Push the yellow precision worm from the gearbox pack onto the solar motor and it should be spinning rapidly! You can thread this motor shaft into the gearbox and the solar motor should generate enough force to turn the gear and axle.
- Secure the gearbox to the wooden chassis by using screws or nuts and bolts to secure it in the holes provided.
- Thread the solar panel through the central hole on the chassis so the panel can balance on top and the motor can be held in place on the base of the chassis.
- For extra security place the motor holder behind the gearbox and push the solar motor in with the shaft and precision gear lined up with the gear in the gearbox.
- Thread the wooden axle through the side panels and add the MDF wheels so the chassis is balanced. To secure the wheels on the axis you may want to use an elastic band as a stopper
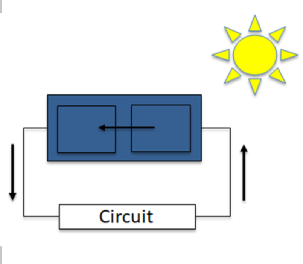
Solar Panel
Solar panels convert light from the sun into electricity that can then be used to power other electronic devices.
Electrical power (in Watts) is given by:
Power = Volts x Amps
In your pack, you should have a 100 mA solar panel and a low inertia solar motor to connect it to. You can connect the motor to the solar panel using tape. In sunny weather, you should be able to see the motor go! We will use this motor in a gearbox to get the car moving!
In perfect conditions, the solar panel produces 100mA and 3V. Therefore, the theoretical power is:
3V x 0.1A = 0.3 Watts
- What are the pros and cons of solar power?
- Can you think of a better way of using solar power for electric vehicles?