Experiment Extravaganza
Experiment Extravaganza
As part of August's Global Science Show, Phil was challenged to see how many experiments he could cram into one twitter video. The maximum length of a twitter video is 2 minutes 20 seconds. How many do you think he managed?
The video
Watch this video to find out!
Find out how to do each experiment:
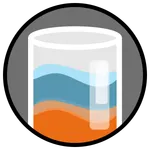 |
Layered LiquidsHead over to Engineer Inside to see Puja make a rainbow with these layered liquids. |
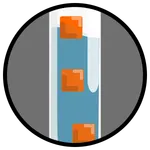 |
Density CubesCheck out an earlier WMG Experiments page to find out how Phil makes these Density Cubes work. |
How does it work?
  |
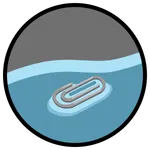
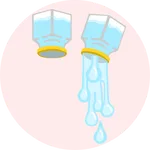
We’ve said in a few of these experiments that water is a bit ‘sticky’. That’s why the water comes with you and sticks to you when you get out of the bath or get caught in the rain! The surface of water is especially sticky and when we place the paperclip this gently on the surface it can get stuck there. If we dropped it in or put it in at an angle there isn’t enough time for the paperclip to get properly stuck so it slides through the water surface and sinks! |
  |
It’s all about how gently we place the paperclip down. It should sink – the metal in the paperclip is more dense than the water we are placing it on. There must be another force pushing the paperclip up to balance the force of gravity trying to pull the clip down. It isn’t quite buoyancy – the force that keeps boats floating – because the paperclip is actually above the water surface so it isn’t displacing any water like a boat would. Instead, the force that is keeping the paperclip in place comes from the strength of the water surface to keep itself together. All the water on the surface is pulling in each direction to form a skin. The force comes from this surface tension. |
  |
The molecules in water are all polar, while the molecules in the air are not. This means that water molecules would much rather be around other water molecules than air molecules! Each water molecule at the surface pulls on all the water molecules around it to form a flat surface. The flat surface leaves the smallest area exposed to the air. When another object is in contact with the water though, the molecules can grab onto that object and pull on that as well – which can make the surface curve slightly. This is what happens at the edge of your container. If you look closely you’ll see what’s called a meniscus where the water surface curves up to meet the container walls. This can happen when we place the paperclip onto the surface completely flat and really gently – all the water molecules around the paperclip now pull on the paperclip as well as other water molecules. The paperclip is helping to keep the water and the air molecules separated. It only works if we place the paperclip down gently because the water surface has to stay flat – if the clip goes in at an angle the whole weight of the paperclip has to be supported by a smaller area of water, the pull of each molecule on its neighbours isn’t strong enough and the skin breaks, with the paperclip falling through and sinking. |
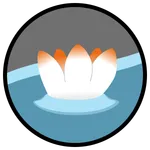 |
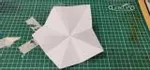
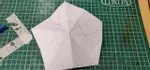
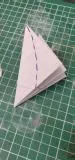
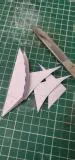
Blooming PaperYou Will Need:
Recreate it:Cut a piece of paper into a pentagon shape. There’s a printable version here. Then you can draw on your flower’s petals from the corners of the pentagon, leaving a circle in the middle. Now cut around your new outline to get a flat flower shape. Colour the flower in on one side of the flower.
It should look a bit like this as you make it! Hold your flower so that your coloured side faces down and then fold the petals into the middle of your flower. Hold the flower by the petals and gently place it onto the water surface – and watch it bloom! |


|
This one is pretty simple! When you fold the paper you squash it a little bit. When you place it onto the water surface the water can get into the paper and help it to expand again. As it expands it straightens back out to the flat shape it started out as! |
|
Paper can soak up a little bit of water and as it does so it expands. Think of a balloon that you have folded. When you try to blow it up it will push the fold back out and try to go back to a normal balloon shape. The same thing is happening here with the water soaking into the paper and pushing it back out. |
|
The reason paper can soak up some water is that it isn’t a totally solid material like metal. Paper is made up of lots of fibres and there are paths along and between these fibres that water can get into. The structure of paper ends up being like a straw that sucks the water up alongside the fibres. The water inside the paper structure takes up space and tries to force the shape of the paper out to being flat so that the fibres are all straightened and lined up so more water can get in. |
 |
Repel Pepper with MagicThis experiment is exactly the same as the surface tension boats the Graduate Trainee Engineers showed you in this WMG Experiments video. |
Launch a RocketHead over to Engineer Inside to see lots of options on how you can launch a rocket! |
|
The air you blow into the balloon is squeezed by the rubber walls of the balloon. The balloon doesn’t want to be stretched and massive – it wants to return to being small and it will push all the air out as soon as you let go! The air that gets forced out makes a jet that pushes the balloon along. Without the fins though, your balloon just goes anywhere and everywhere really quickly. The air that is moving around the balloon as it flies gets in the way and your balloon spirals through it. The fins that you have added make it harder for the balloon to turn – which makes it fly straight! |
|
Imagine a rocket. Are they balloon shaped? No! They’re pointy and thin. That helps them to move through the air better. As it moves, the shape of the rocket helps to guide the air around and past the rocket so that it doesn’t get pushed off course. Our balloon can’t do that – it’s got a bit round shape that the air can go any direction it likes around and push the balloon off course a lot. That’s why it goes so crazy when you just let go of it at first. The fins we add control that air flow a bit and help to guide the air around our balloon and stop it being pushed off course. |
|
We have a force squeezing and pushing air downwards out of the balloon. What does Newton’s Third Law tell us? That action must have an equal and opposite reaction! The balloon squeezes out the air and pushes it downwards and in turn that pushes our balloon up. If the direction of the air coming out the bottom of the balloon changes, the direction the top of the balloon gets pushed and flies through the air will change too. Adding the straw makes the opening of the balloon more rigid and will help to control the direction of the jet of air. Adding the fins makes this part of the UFO (Unusual Flying Object) harder to push off course – think about trying to walk with an umbrella on a windy day, it’s very hard to get the umbrella to move away from where the wind is blowing! The fins help us to control the direction that the air is coming out and that in turn helps to control the direction the balloon goes in. |
 |
Gravity Defying WaterThis experiment is exactly the same as the Graduate Trainee Engineers showed you in this WMG Experiments video. |
 |
Tornado in a BottlePhil has done this experiment before as well - you can see how it's done and how it works here. |
 |
Cloud in a BottleComing soon! |