Using ScratchX Extension

An extension is created in ScratchX for each tile. Follow the instructions below to load an extension to control a tile:
- Using chrome browser, go to the ScratchX extension page: www.scratchx.org
- There is a problem passing arguments into ScratchX. We've created a simple extension 'loader' which 'gets round' the problem of passing arguments. This extension loader can be loaded by clicking on 'Open extension URL' and pasting the URL: https://megjlow.github.io/extensionloader.js
- This creates a ScratchX block to load further extensions, with arguments:
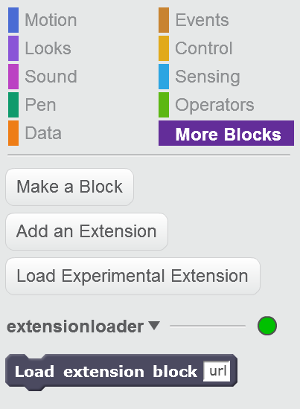
- Pull the 'Load extension block' into the scripts area and enter: https://megjlow.github.io/socket.js?ip=192.168.2.105 (replacing the IP address with the IP address of your NodeMCU). This loads the extension with commands to control the pins on your board:

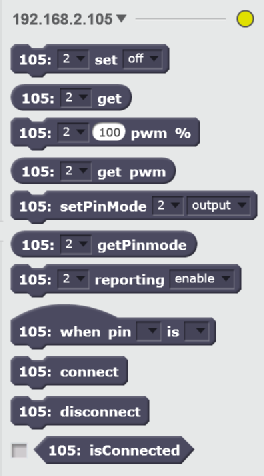
- Click on the 'Load extension' block to run it, this will load in the extension with commands that enable you to control the NodeMCU pins:
- Multiple NodeMCU extensions can be loaded via this method.
- Many of the NodeMCU digital pins can be controlled via this extension. They can be set as input, output or pwm.
To help build your first tile see the section Create a Tile