
Record a presentation on Mac
Overview
Mac computers have an easy to use, but effective, screen recording tool built-in, called Screenshot.
More sophisticated tools are available (Screenflow is the best, at about £80). But every Mac with a recent version of MacOS has Screenshot built-in.
Screenshot is one of the Mac's most useful features. It also takes still images. Find out more.
It can be used to record whatever is on your screen (including a slide show), as well as audio from the computer or your mic. However, adding the picture of you speaking from your webcam requires an extra trick using another built-in application.
Let's start with basic screen and audio recording. Then we will look at how to add your webcam.
Recording with Screenshot
You can find Screenshot through Spotlight search (CMD + space, then type Screenshot).
Or use it's shortcut Shift + CMD + 5).
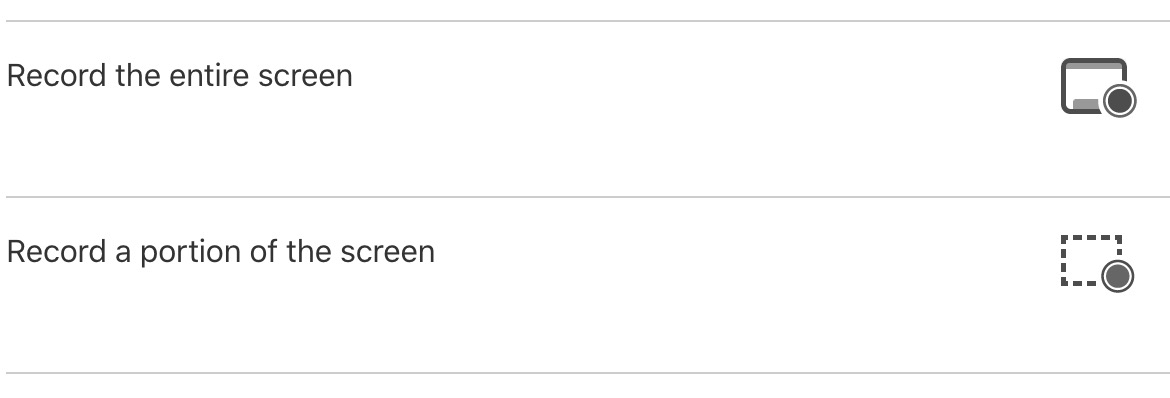
Then select the option to record the whole screen, or part of the screen (and position the selected area as required).
Then select the Options menu and choose:
- a microphone input if you want to add narration;
- a location for the finished recording;
- whether you want your mouse pointer to appear in the recording;
- the delay between you pressing start and the recording actually starting (essential useful).
Press the record button when you are ready. A recording icon appears in the menu bar at the top-right of your screen.
To stop recording, press CMD + CTRL + ESC or click on the recording icon in the menu bar.
Screenshot does not include editing tools, so you will need to trim the start and end if necessary. If you set your recording to open in Quicktime, you can use its's basic editing tools. Or use Apple iMovie for more sophisticated editing, or the tools built in to your video streaming platform (Microsoft Stream, Echo 360, eStream and Youtube all have basic editing tools).
How to include your webcam in the recording
Screenshot does not currently have this option. However, you can use a different app to put your webcam live image onto the screen as you record, and include it in the recording. The easiest option is to use the Quicktime app (also built-in and free). Alternatively, some people use a free application called HandMirror, which simply pops-up a small window showing your web cam view. If you do use this, configure its preferences with the setting "Close popover when: click on the icon again". You can then position and reposition the web cam anywhere on your screen and it will float over other windows.
Quicktime method
You can find Quicktime through Spotlight search (CMD + space, then type Quicktime).
In the Quicktime menu, select File then New Movie Recording.
A window will appear showing your webcam image. You don't need to start Quicktime recording, just have this window on screen when you are using Screenshot to record the screen and your audio.
Important:
In the Quicktime menu, select View - Float on top. This will ensure that your webcam image doesn't get hidden behind other windows.
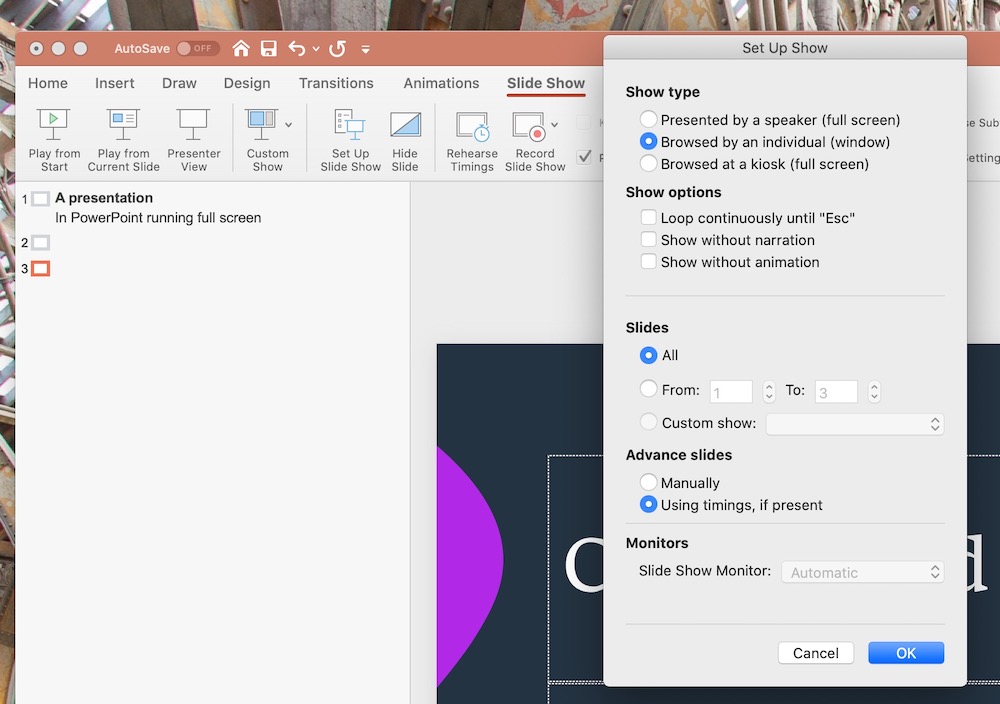
In Powerpoint, set your slide show to run in a Window, not full screen:
Resize and position the Quicktime window in front of PowerPoint, where it will not get in the way of any text on the slides (you can move it when recording if necessary).
Next you can follow the instructions for recording your screen with Screenshot (above), and your webcam image will be included.