
Add a course header and other visual elements
This guide will introduce you to the reusable HTML templates that we refer to as Snippets and how these can be used to create Course Headers, separate content and emphasise design elements such as labels. It notes that there is also a Course Description field that can be used to aid with searching.
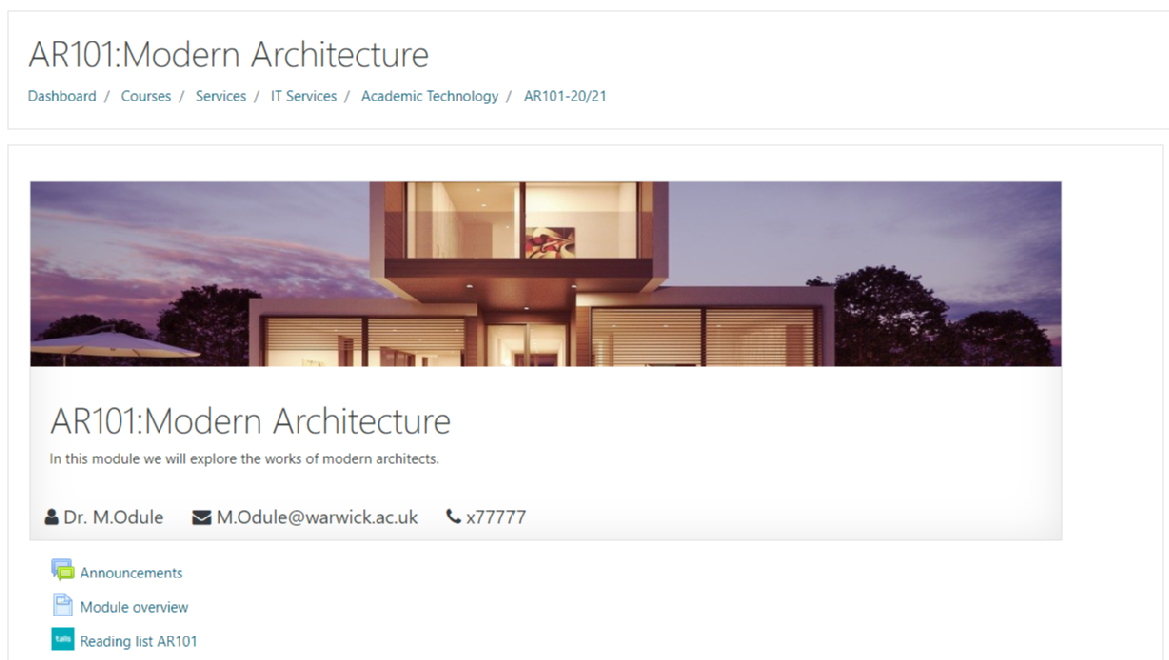
What is a course header?
All Moodle course page formats have a section or topic 0 that appears at the top of the page. This is typically where someone would add information about the module or course - this might be an image, the module code and name, and contact details for the module convener. We refer to this as the course header and it serves the same purpose as the hero images on a website - to draw the attention of the person entering the page, to give them immediate confirmation that they are in the right place, and direct them to someone or somewhere to get help if they need it.
What are snippets?
Snippets are reusable HTML templates that are added using the Templates4u button on the editing (Atto) toolbar in any editable section of Moodle. They can be added to section headings (including section 0, the course header area), activities such as labels, pages or books, in the description for an activity, and into a HTML block in the right hand column.
Snippets are designed to be responsive i.e. to work on different sized screens, as well as accessible to screen readers and meeting current standards for the contrast between font and background colours, for example. They use Warwick colours and font awesome 4.7 icons for clarity. Where they use images, these will resize and stay centred.
Add a snippet as a Course Header
- Go to the Moodle space and click Turn editing on.
- Click Edit in the top section of the Moodle space, then click Edit settings. This is commonly referred to as Section 0 and inserting a snippet here will always appear above the main content of the space.
- Click on the Templates4u icon on the Atto editing toolbar
- Click on the drop-down to display a list of available snippets. Choose one of the options to display a preview recommend:
- Large-header-with-fullwidth-image-lifted-paper
- Large-header-with-image-lifted-paper
- Large-header-with-image-left-text-right
- Course-header-light-black-text-image
- Course-header-dark-white-text-image
- Click Insert to add the snippet into the text editing window.
- Edit the text, replace the image or make any other changes. See the video above for more information.
- Click save and return to course.
Add a snippet as a separator
Snippets can also be used in labels, pages and books to separate content, or as a visual element separating activities on the Moodle course page.
- Go to the Moodle space and click Turn editing on.
- Add a new activity or edit an existing one.
- Go to where the snippet will be added. This could be the description for the activity or the content area e.g. a label only has a content area, but a page has both a description and a section for content. Snippets can be added to either for differing effects.
- Click the Templates4u button on the Atto editing toolbar
- Click on the drop-down to display a list of available snippets. Choose one of the options to display a preview.
- Click Insert to add the snippet into the text editing window.
- Edit the text, replace the image or make any other changes. See the video above for more information.
- Click Save and return to course.
Add a Course Description
Moodle spaces can also have a description and image added that appear on search pages. This is added to the page via a course summary block, and which could therefore be added in place of, or in addition to, a course header.
- Click the cog icon on the top right of the Moodle course space.
- Click Edit settings.
- In the Description section:
- Add a summary of the course and any other details that you wish to appear when people search for courses. You can also use the same Snippets that are described above.
- Add a Course image. Click the Add icon and browse for your image.
- Click Save and Display.
Follow the instructions for adding a block to insert a Course Summary block into the right-hand column in the Moodle space.